Table of Contents
Introduction
If you have recently faced problems with your Windows 10 installation, it’s time to repair it. A repair install has the advantage of not reinstalling Windows 10 but instead fixing issues with your current Windows installation. Windows 10 in-place upgrade or reinstallation is another term for Windows Repair Install. Windows 10 Repair Install can reload system files and configuration without losing any user data.

Before proceeding with Repair Install Windows 10, double-check the following:
- Make sure your Windows drive has at least 9 GB of free space (C:)
- Be prepared with installation media (USB/ISO).
- Make sure the Windows setup is the same build and edition as the Windows 10 you currently have installed.
- The language of the Windows 10 setup must match the language of the Windows 10 that is already installed on your computer. This is critical for maintaining your files after the repair.
- Ensure you have the Windows setup in the same architecture (32-bit or 64-bit) as your existing Windows 10 installation.
Create a Windows 10 Installation Media
Step 1: Click here to get the Windows 10 setup.
Step 2: Click “Download tool now” to download the file to your computer.

Step 3: Accept the licensing agreement next.
Step 4: Choose “Create installation media for a different PC.”

Step 5: Check “Use the recommended options for this PC” on the select language, architecture, and edition screen.

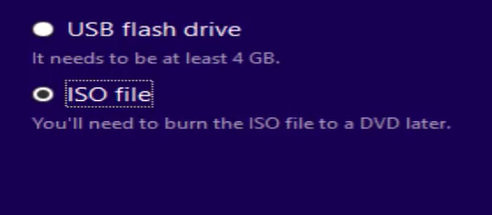
Step 6: Click Next after selecting the ISO file.

Step 7: Be patient as the Windows 10 ISO download takes some time.
Start Repair Install Windows 10 from the Installation Media
Step 1: After you’ve downloaded the ISO, use Virtual Clone Drive to mount it.
Step 2: From the Windows 10 virtual load disc, double-click setup.exe.
Step 3: Click Next after selecting the “Download and install updates” box on the next screen.

Step 4: Agree to the conditions of the license.
Step 5: Now, simply follow the on-screen directions by clicking “Next.”
Step 6: The last dialogue box, titled “Choose what to keep,” is highly crucial.
Step 7: Be sure to check the box that says “Keep personal files, programs, and Windows settings” before pressing Next to start the repair process.

Step 8: While the system image is being updated, your PC will automatically reboot many times without losing any data.
Conclusion
Hopefully, we have helped you understand how to easily repair and install Windows 10, but if you have any further issues, please leave them in the comments area.


Leave a Reply