Table of Contents
Introduction
Before we discuss How to fix Scratch Disks Are Full Error In Photoshop, let us understand the reasons behind it. A scratch disk is a disk drive or solid-state drive (SSD) that is used to store temporary data while an application is running. Scratch disks are used by Photoshop to store items that don’t fit in RAM, such as sections of your document and their history panel states. It serves as both a workstation and a virtual or cache memory. Scratch files are placed in an operating system-specific folder that is hidden.
Photoshop sets the primary scratch drive to the hard disk where the operating system is installed by default. However, there are several possible causes for the error. In this article, we will assist you to learn How to fix Scratch Disks Are Full Error In Photoshop.
Method 1: Review and free up filled disk space
The most typical cause of this problem is a shortage of free space in the drive that contains the scratch disc. So, before moving forward, identify the scratch drive and verify that you have sufficient storage space. Photoshop does require an additional free space of 40 GB; if you don’t have that much space, delete some old and obsolete files to free up as much space as possible.
Method 2: Delete Unused Temporary Files
As the name implies, temporary files are files that hold temporary data created by the Windows operating system or by programs that users utilize. These temporary files are created in the case of media or graphics-related editing software to save your task in progress and save a recovery backup in the event of unexpected system or program shutdowns.
When working on a major project, Photoshop is more than capable of creating a mountain of temporary files. These files make the software perform more smoothly and quickly. When you repeatedly close your software, it will leave a huge amount of data behind. As a result, these temporary files must be deleted in order for Windows to function properly. Because they commonly begin with PST or Photoshop Temp, these files are easily identifiable and detachable (in newer versions).
The procedure is straightforward: go to the temp folder and delete all files beginning with Photoshop Temp or ~PST. You can find the temp folder here: C:\Users\Username\AppData\Local\Temp. If you can’t find the ‘Temp’ folder there, enter the ‘Run’ dialogue box by pressing Windows Key + R. Type ‘percent appdata percent’ in the box next to ‘Open’ and press Enter.
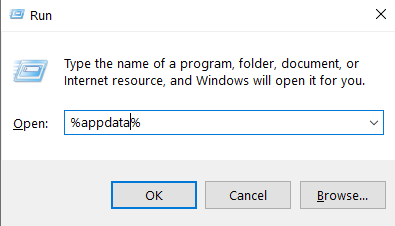
This will open Explorer and take you to the user’s AppData folder. Navigate to ‘Local > Temp.’
You may now use the search bar to directly look for PST or Photoshop Temp files. Press the Ctrl key and click Delete to select all of the transient files. Once, restart both your program and your system.
Method 3: Change the Scratch Disk location
If you exceed that limit, problems will inevitably arise. Move the scratch disk to a larger drive if the existing disk is nearing capacity.
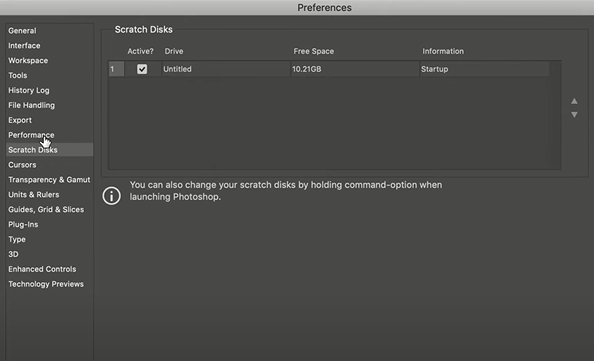
Launch Photoshop, navigate to the Edit menu, then to Preferences then, and then to the “Scratch Disk…” option, as described before. Select the one you want to switch to from the list of all available drives, and you’ll be ready to go once you restart the system.
There is a simple shortcut to modify the Scratch Disk Preference if your application displays the “scratch disk is full” error before you can get into settings. On a Windows computer, hit the “CTRL + Alt” key or press ‘Command + Option on a Mac.” When you click the arrow next to “First,” a list of all the possible partitions with their available space appears. Restart your device after selecting another partition and clicking “OK.”
Method 4: Enable Photoshop to use more RAM
RAM stands for random access memory, as you may know. It’s a lightning-fast component that temporarily saves all of the data that your system could need right now or in the near future. It’s a volatile memory that serves as your device’s short-term memory.
Photoshop is set to consume approximately 60% of your total RAM. However, you can increase or lower the RAM limit manually. To increase the RAM limit, follow the procedures below.
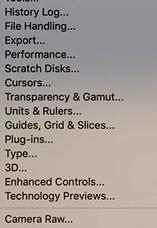
Step 1: After starting Photoshop, go to ‘Edit’ and then to ‘Preferences’ at the bottom. Select ‘Performance’ from the submenu.
Step 2: Increase the amount of RAM that Photoshop is authorized to access by adjusting the slider under “Memory Usage” in the Performance Menu.
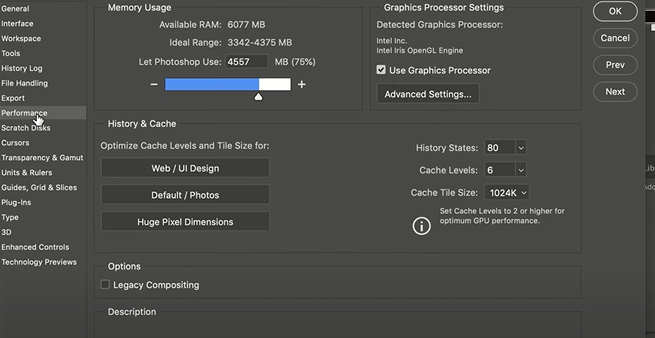
We advise against enabling access above the 80 percent barrier because it may cause your computer to slow down. Exit Photoshop and restart your computer before attempting to use it again.
Method 5: Adjust your Scratch Disk preference
Setting up a dedicated hard drive partition for Photoshop is the way to go if you use it frequently. The default scratch disc will do if it isn’t possible, but you can still give the application permission to access other partitions. Allow all of your partitions to share the responsibility of being a scratch disc.
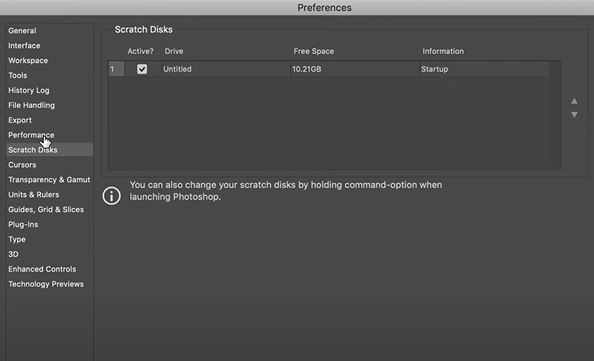
It’s simple: go to Edit > Preferences and choose Scratch Disk. Check if the boxes next to all drives are under the ‘Active?’ column once you’re in the Scratch Disk tab. To exit and resume Photoshop, click ‘OK.’
Method 6: Extend your Scratch Disk’s space
There is another option to increase scratch disk storage space besides freeing up the current space.
Unallocated storage can sometimes be found on a hard disk; this unallocated storage can be dipped into and combined with the drive’s main storage. This directly improves the storage capacity of the primary drive. You can also combine or merge unused space from other hard disks into the main one. Either the built-in Disk Management Console Window or a third-party application can be used. Third-party apps can aid in the expansion of the Photoshop file storage partition. The partition can be moved, resized, extended, merged, or even split with this application. Restart Photoshop and see whether the problem persists after the main hard drive has been expanded.
Method 7: Defragment your Hard Disk
The Photoshop “scratch disks are full” error can appear even if your scratch disk has ample free space. Defragmentation is a possible approach in such situations.
The defragmentation process improves data access performance by reorganizing files on a disc to occupy contiguous storage areas. Head travel is reduced here, which reduces the time it takes to read and write files to and from the disc.
Method 8: Clear crop tool value
If the issue appears while cropping a photo, the size and resolution values in the options bar may have been entered improperly, or the numbers are in the wrong units. Entering 14401600 measurements in inches rather than pixels, for example, can cause the scratch drive to be a full error by creating a larger file.
After picking the crop tool but before dragging a crop selection, go to the Options bar and select ‘Clear.’
How much is scratch disk space required?
The amount of scratch space required is primarily determined by how you edit and the number of history states in memory. If you just plan on making minor modifications, you’ll need at least 1.5 GB of storage space and at least double the size of all the files you have open simultaneously. You’ll need more room for larger and more complicated modifications. You may require the original file’s size as many times as there are historical states. Photoshop will take up at least 6 GB of space on the boot drive and around one GB of space on the non-boot drive. This prevents difficulties from arising as a result of the operating system’s running out of space. Hundreds of loaded patterns or brushes increase the amount of scratch space required for Photoshop to launch.
Conclusion
In this article, we have outlined all the required details to let you know How to fix Scratch Disks Are Full Error In Photoshop. However, if the issue continues, you can disable auto-recovery saving and purge the cache. If you have any other issues related to this, let us know in the comment area. Check all other PhotoShop relates Fixes here.


0 Comments