
Table of Contents
Introduction
Users utilize administrator accounts to perform actions that require special rights, such as installing software or changing the name of a computer. These Administrator accounts should be audited regularly, with a new password and confirmation of who has access to them. But if you are unaware of the procedure to enable or disable an administrator account, this article is for you.
This guide will walk you through every stage of the process to enable or disable an administrator account on the login screen in windows 10
Steps To Enable Or Disable Administrator Account On Login Screen In Windows 10
Method 1: Enable an Administrator Account in Windows 10 using Command Prompt
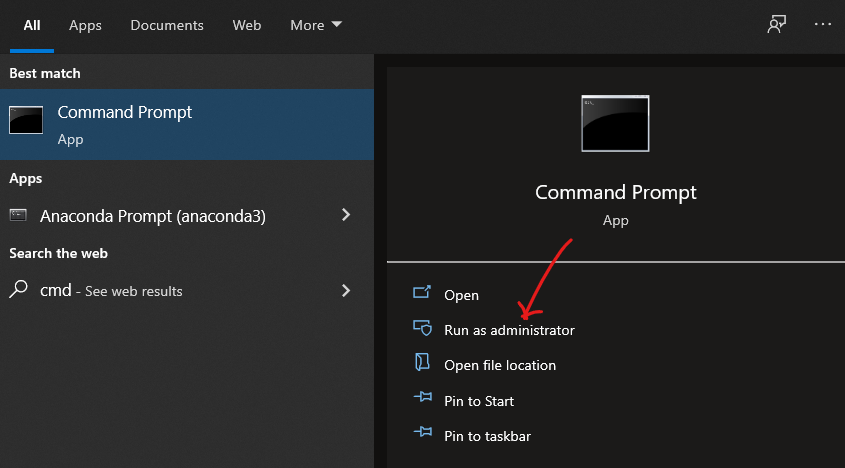
Step 1: Firstly, click on the Windows key on your keyboard. Click on the search icon on your desktop, and type cmd there.

Step 2: Now, choose the “Run as administrator” option.
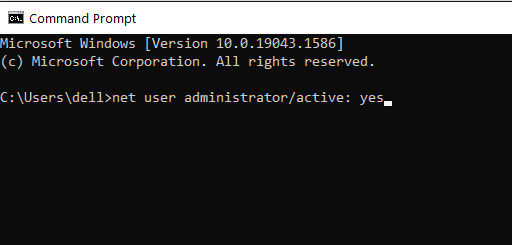
Step 3: Type the following command ‘net user administrator/active: yes. After that, press enter.
Step 4: Log out of your computer. And, log in back. You will see the ‘administrator’ option under your account. Congratulations! You have successfully enabled the administrator account.
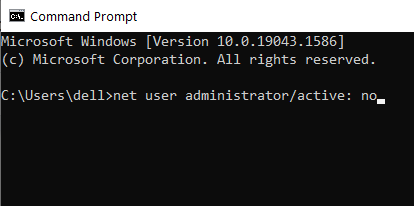
Step 5: Now, if you are looking to disable an administrator account. Go back to your cmd. And type the command ‘net user administrator/active: no’. Later, when you are on your computer, you will see the administrator account disappear.
Method 2: Enable Administrator Account in Windows 10 using Admin Tools
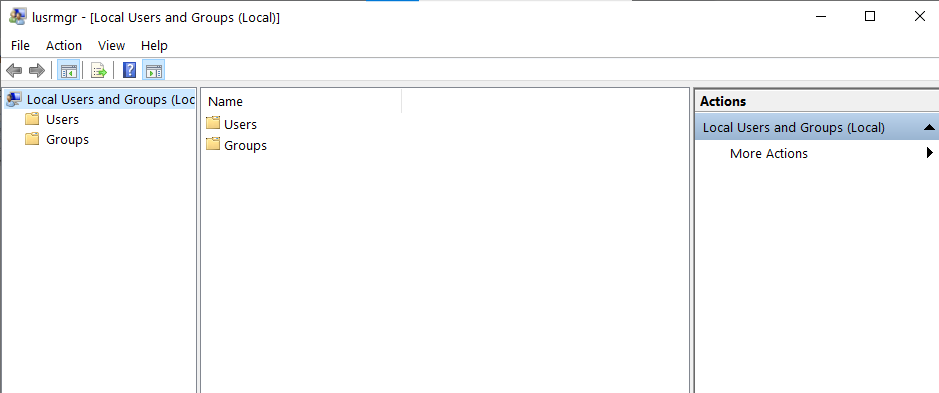
Step 1: Go to the search menu and type Run into the search box to open the Run dialogue box. Click OK after typing lusrmgr.msc as shown below.

Step 2: Double-click Users under the Name field as shown below.
Step 3: To open the properties window, double-click on Administrator.

Step 4: Uncheck the option labelled “Account is disabled” here.
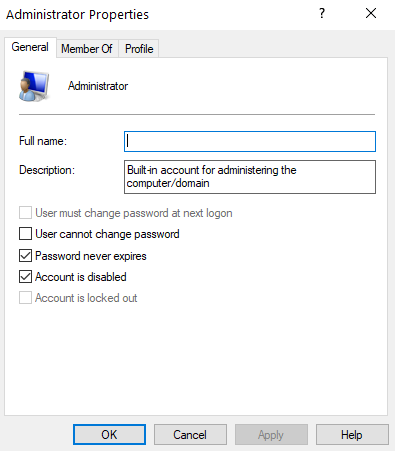
Step 5: Finally, click OK, then Apply to save your changes.
Method 3: Enable the Administrator Account in Windows 10 using the Registry Editor
Step 1: Type regedit into the Run dialogue box (by pressing the Windows key and R keys together).
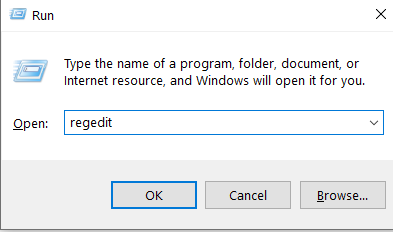
Step 2: Click OK and visit via the following path:
Computer\HKEY_LOCAL_MACHINE\SOFTWARE\Microsoft\Windows NT\CurrentVersion\Winlogon\SpecialAccounts\UserList
Step 3: Right Go to New > DWORD Value and select UserList.
Step 4: Enter the Administrator’s name and press Enter.
Step 5: After restarting the computer, you should see an option to log in as an administrator.
Conclusion
We’ve covered every option for enabling or disabling an administrator account on the login screen in Windows 10. Please let us know if you continue to encounter issues in the comments section. Please let us know if you have any other ideas.
Read all Windows-related Fixes and How-to articles here.

Leave a Reply