Table of Contents
Introduction
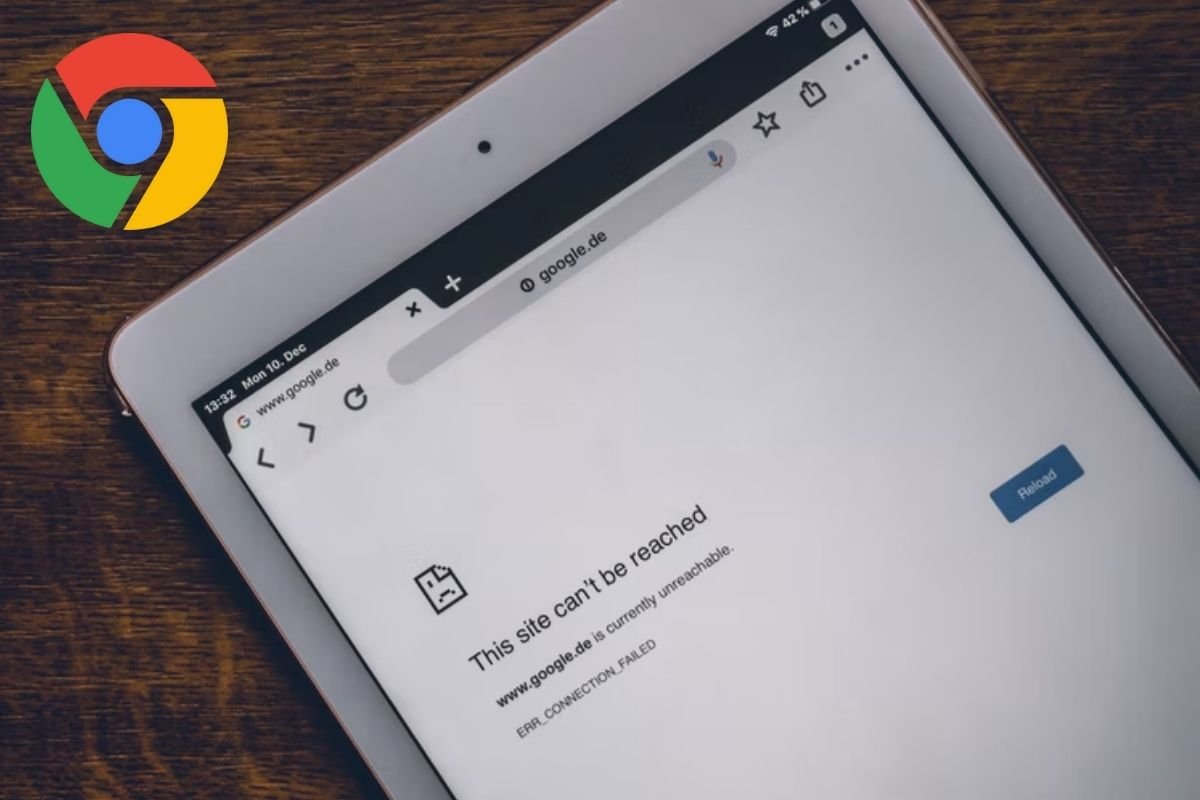
If you get the ERR_CONNECTION_ABORTED error while viewing a web page in Chrome, it signifies that the page you’re trying to visit doesn’t support SSLv3 (Secure Socket Layer). In this article, we will try to Fix ERR CONNECTION ABORTED in Chrome.
Furthermore, the issue may be generated by third-party software or extension preventing access to the website.
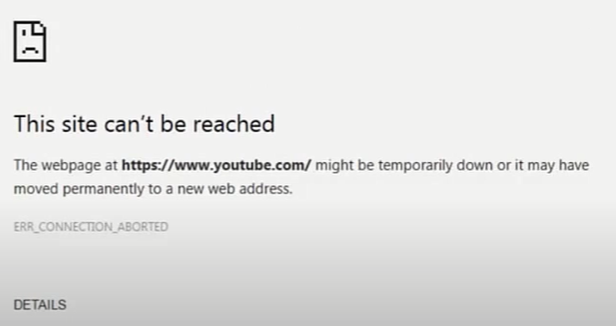
The error message for the ERR_CONNECTION_ABORTED error is as follows:
This site can’t be reached
The webpage might be temporarily down, or it may have moved permanently to a new web address.
ERR_CONNECTION_ABORTED
In other circumstances, it simply implies that the website is unavailable; to confirm this, open the same web page in a different browser and see whether you can view it.
Chrome has a problem if the web page opens in another browser.
So, without wasting any more time, let’s examine how to fix ERR_CONNECTION_ABORTED in Chrome using the troubleshooting procedures described below.
Methods to Fix ERR CONNECTION ABORTED (ERR_CONNECTION_ABORTED) in Chrome
Method 1: Run System File Checker
Step 1: Click Command Prompt after pressing Windows Key + X (Admin).

Step 2: Now, in the cmd, input the following and press enter:
Sfc /scannow
sfc /scannow /offbootdir=c:\ /offwindir=c:\windows (If above fails then try this one)

Step 3: Wait for the aforesaid process to complete, then restart your computer.
Method 2: Use a different DNS server
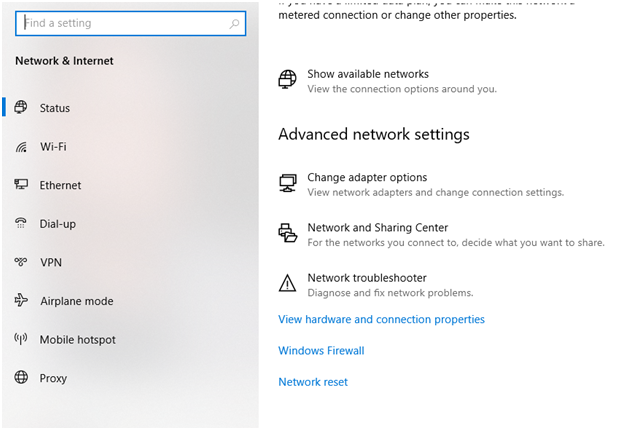
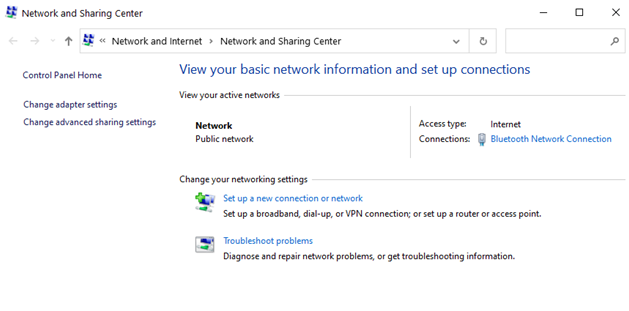
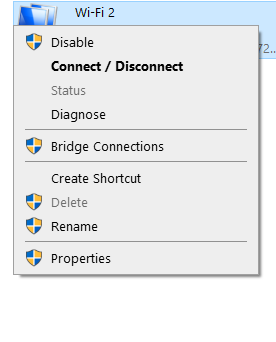
Step 1: To open the Network and Sharing Center, right-click on the Wi-Fi symbol in the system tray and select “Open Network and Sharing Center.”

Step 2: Select “Network and Sharing Center” from the drop-down menu.
Step 3: Next, enter Settings and then Properties by clicking on your current connection.
Step 4: Next, go to Properties and pick “Internet Protocol Version 4 (TCP/IP)”.
Step 5: Next, pick “Internet Protocol Version 4 (TCP/IP)” and go to Properties.

Step 6: Select “Use the following DNS server addresses” from the drop-down menu.
Step 7: In the Preferred DNS server and Alternate DNS server fields, type the following addresses:
8.8.8.8
8.8.4.4
You can also use other Public DNS Servers instead of Google DNS. Finally, to utilize Google DNS or OpenDNS, click the OK box.
Step 7: Select “Validate settings upon leaving” from the drop-down menu and click OK and Close.
Method 2: Reset Windows Socket Configuration
The Windows Socket Configuration (WinSock) is a set of parameters that the operating system uses to connect to the internet.
It is made up of socket program code that sends a request and receives a response from a remote server.
It is possible to reset all network configuration settings on a Windows PC using the netsh command.
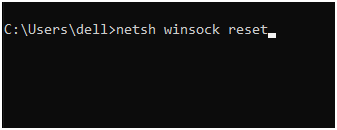
Step 1: Open the Windows search by pressing Windows Key + S, then typing cmd or Command Prompt and selecting Run as Administrator.
Step 2: Press Enter after typing the following commands:
netsh winsock reset
netsh int ip reset
Step 3: Restart your computer after the Windows Socket catalog has been reset to apply the modifications.
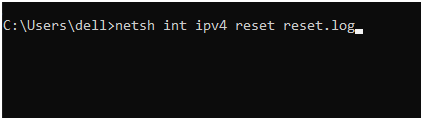
Step 4: Open the Command Prompt once more, then type and hit Enter to enter the following command:
netsh int ipv4 reset reset.log
Method 3: Flush the DNS Resolver Cache to Re-initialize DNS
The local DNS resolver cache can sometimes interfere with its cloud counterpart, making it harder to load new websites. The online cache is prevented from storing new data on the computer by a local database of frequently resolved websites.
Clearing the DNS cache is required to resolve this issue.
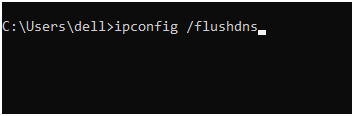
Step 1: Open the Command Prompt as an administrator.
Step 2: Now run ipconfig /flushdns into the command prompt and hit Enter.
Step 3: If the DNS cache is successfully flushed, the following message will appear:
DNS Resolver cache was successfully fetched.
Step 4: Now restart your computer to see whether the Site Can’t Be Reached, Server IP Could Not Be Found problem has been resolved.
Method 4: Restart DNS client
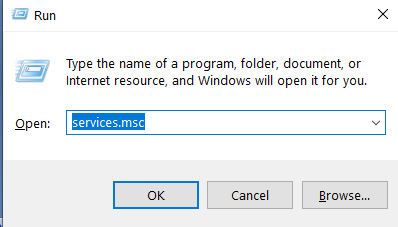
Step 1: Click on the windows icon or press the Windows button, search for services, press the Windows key plus R, and type services.msc then press enter.

Step 2: Scroll down to “Network Store Interface Service” and click it (Press N to easily find it). Right-click Network Store Interface Service and choose Restart from the context menu.
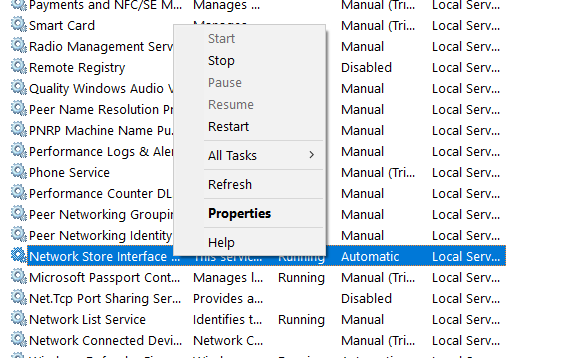
Step 3: Repeat the above step in the services list for the DNS and DHCP clients.
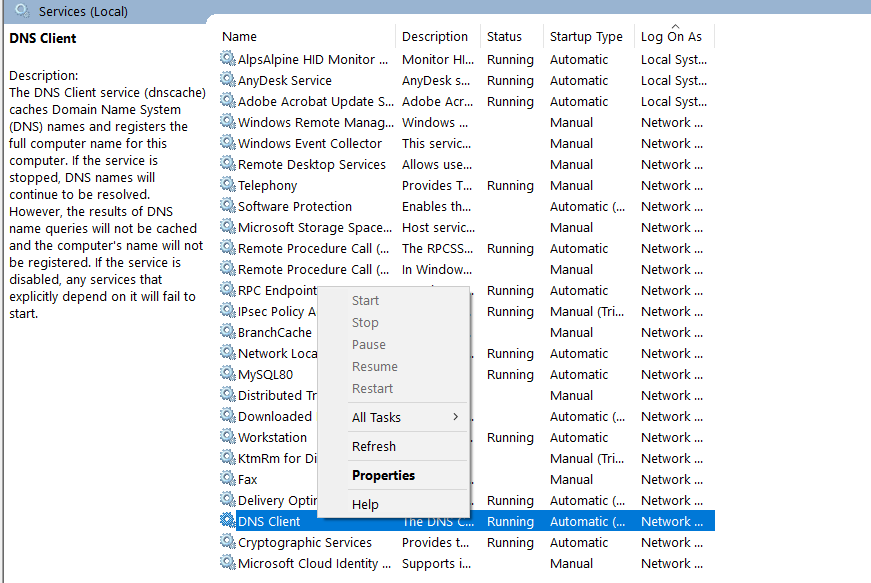
Step 4: Now that the DNS client has restarted, check to see if you were able to resolve the problem.
Method 5: Run Network Troubleshooter
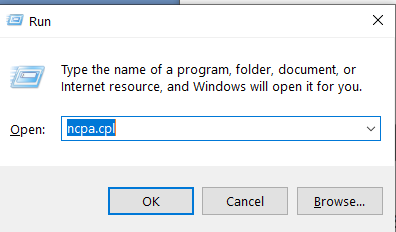
Step 1: Press Windows + R and type ncpa.cpl and click on OK.
Step 2: Then click on diagnose.
Step 3: Allow the Network Troubleshooter to run, and the following error notice will appear:
“Wireless Network Connection” does not have DHCP enabled.
Step 4: Select “Try these Repairs as an Administrator” from the drop-down menu.
Step 5: Click Apply this Fix on the following prompt.
Method 6: Reset Chrome Browser
Note: Before continuing, make a backup of your Chrome data.
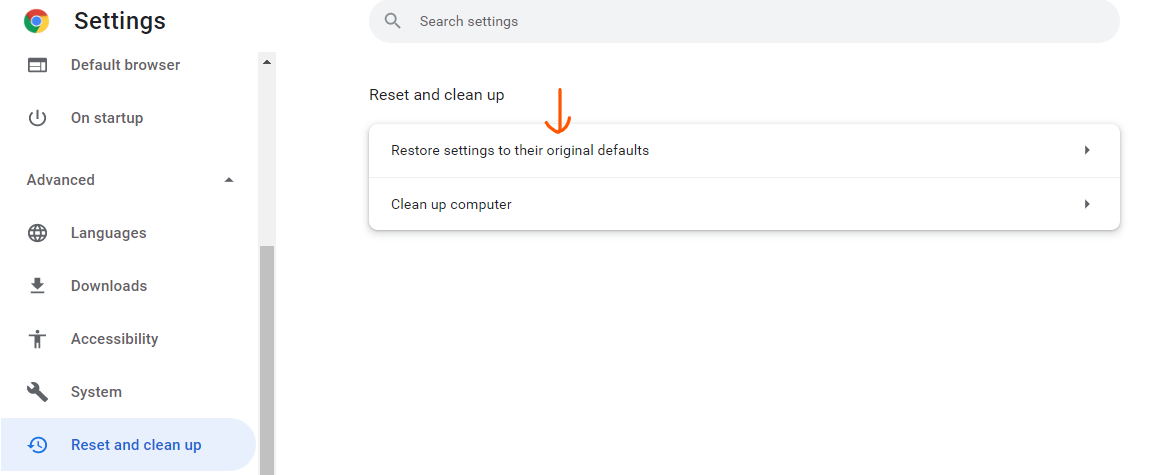
Step 1: Go to Chrome Settings, scroll down to Advanced, and click it.
Step 2: Go to the advanced tab. Click on “reset and cleanup.”
Step 3: When you’re sure you want to restore Chrome to its original settings, click the Reset settings option in the dialogue box below.
Method 7: Reinstall Chrome to fix ERR_CONNECTION_ABORTED
Step 1: Access Settings by pressing Windows Key + I, then select Apps.
Step 2: Select “Apps & Features” from the left-hand menu.
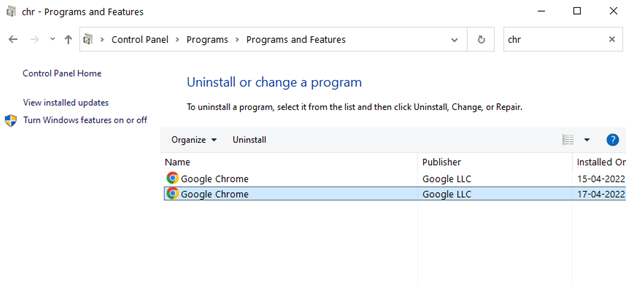
Step 3: Go to the bottom of the page and look for “Google Chrome.”
Step 4: Select Google Chrome and then the Uninstall option.
Step 5: Confirm Chrome’s deletion by clicking the Uninstall icon once more.
Step 6: Once Chrome has been uninstalled, restart your computer to apply the changes.
Step 7: Download and install the most recent version of Google Chrome once more.
Note: Reinstalling Chrome will wipe out all of your data, so create a backup of your bookmarks, passwords, and settings before proceeding.
Method 8: Use Chrome Cleanup Tool to fix ERR_CONNECTION_ABORTED
Cleaning the cache data assists in troubleshooting enhances web page loading times, and boosts your computer’s efficiency. The cache can cause issues with the view if the browser does not load the site’s current version, even if the site has changed since the last visit.
The cache on your Android phone is a collection of tiny data files that your apps and web browser use to improve efficiency. On the other hand, cache files might become corrupted or overloaded, resulting in performance difficulties.
Although the cache does not need to be cleaned regularly, doing so can be beneficial.
The official Google Chrome Clean-up Tool assists in scanning and removing applications that may cause issues with Chrome, such as crashes, strange startup pages or toolbars, unwanted adverts that won’t go away, or generally altering your surfing experience.

Conclusion
This article has provided all the required details to Fix ERR CONNECTION ABORTED (ERR_CONNECTION_ABORTED) in Chrome. Hopefully, you successfully fixed ERR_CONNECTION_ABORTED in Chrome, but if you have any questions, please leave them in the comments area.
Read more Chrome-related fixes here.

Leave a Reply