Table of Contents
Introduction
A wireless mouse is more straightforward to pack and transport than a wired mouse to multiple workplaces. A wired mouse’s cord is just one more thing to remember to bring when traveling. Furthermore, a wired mouse cord frequently tangles in a computer bag, causing extra frustration. There is no cord, mess, or fuss with a wireless mouse.
Let’s face it: most people’s most significant complaint about a mouse is the cable. It takes up a lot of room on your desk. It tangles up. It makes it difficult to move the mouse. The usage of a wireless mouse enhances mouse functionality significantly. Working with a wireless mouse allows you to work from the comfort of your own home.
You don’t have to sit exactly next to it to use your mouse. This makes using a wireless mouse excellent for people who give presentations in front of giant screens. You can manage your computer screen from anywhere in the room.
You can even use a computer from anywhere in the room if you use a wireless keyboard. However, if your wireless mouse isn’t working, getting stuck, or freezing on your PC, you must face big trouble. You need not worry as you’ve come to the right place because we will talk about how to fix it today.
This issue can arise for various reasons, including obsolete, corrupt, or incompatible drivers, power management issues, battery exhaustion, USB port problems, etc. So, let’s check how to fix Wireless Mouse Not Working on Windows 10 using the troubleshooting guide listed below.
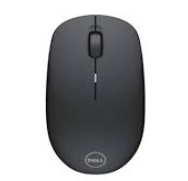
With your wireless mouse, you may encounter the following issue:
- The mouse pointer moves unpredictably
- The mouse pointer becomes stuck or freezes
- Clicking the mouse button has no effect
- Grayed-out mouse settings
- Windows is unable to identify mouse drivers
Check to see if your wireless mouse batteries are charged or if you need to replace them entirely. Also, see whether your wireless mouse works on another computer. If it doesn’t work, your gadget is broken, and you’ll need to replace it.
Methods To Fix Wireless Mouse Not Working in Windows 10
Make a backup copy of your data in case something goes wrong. To access Mouse capability on your PC, use a USB Mouse, Touchpad, or PS2 Mouse connector, and then try the methods below:
Method 1: Start HID Service
Step 1: Press the Windows and R button combination, type services.msc, and press Enter.

Step 2: Double-click the Human Interface Device (HID) service to access its Properties box in the list.
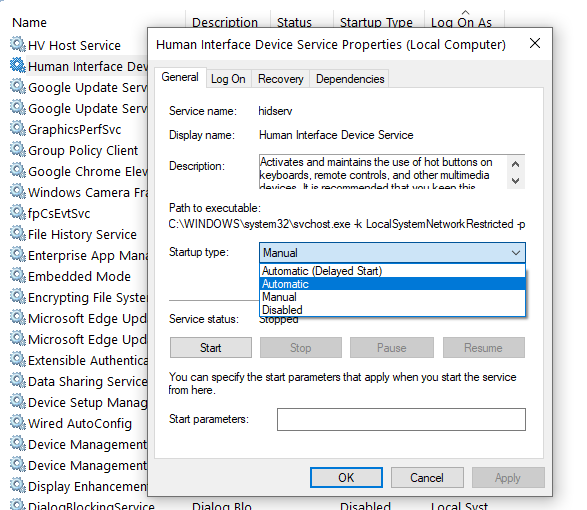
Step 3: If the service isn’t running, make sure the Startup type is set to Automatic and click Start.
Step 4: Click Apply and then OK.
Step 5: Reboot your computer to save your modifications and see if the mouse scrolling issues have been resolved.
Method 2: Disable Fast Startup
Step 1: To launch the Control Panel, use Windows Key + R, type control, and press Enter.

Step 2: Go to Hardware and Sound, and then to Power Options.
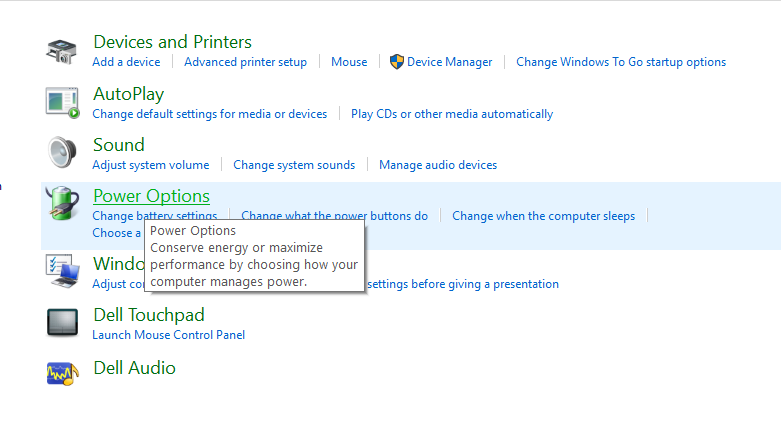
Step 3: Select “Choose what the power buttons do” from the left window pane.

Step 4: Now go to “Change settings that are currently unavailable”.
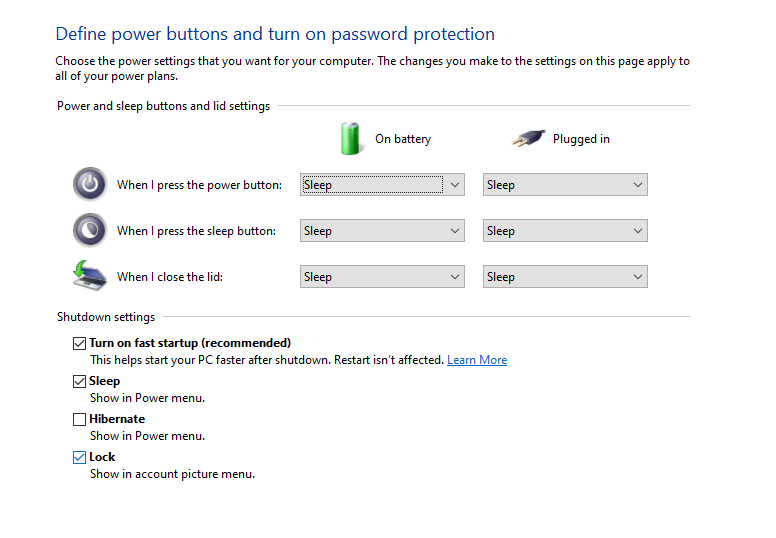
Step 5: Click on save changes after un-checking “Turn on fast startup.”
Method 3: Turn off Filter Keys
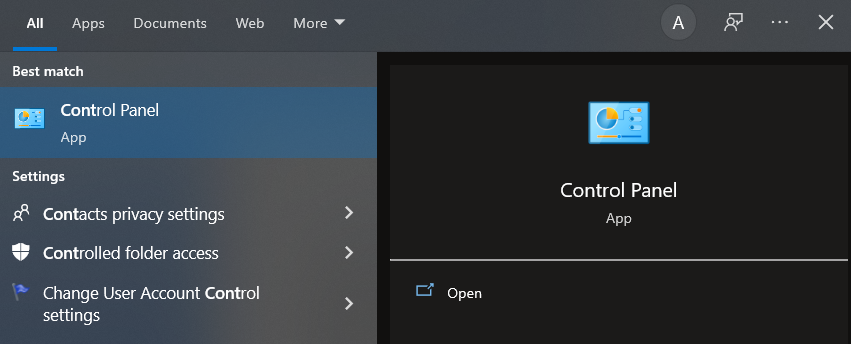
Step 1: Type control in the Windows Search, then click on Control Panel.
Step 2: Inside Control Panel, click on Ease of Access.
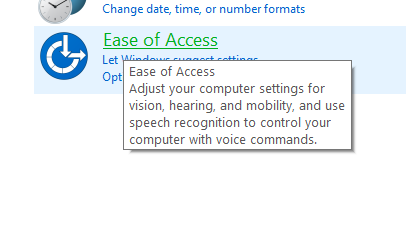
Step 3: Now, you need to click on Ease of Access center.

Step 4: On the next screen, scroll down and select Make the keyboard easier to use.
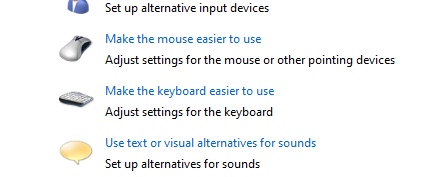
Step 5: Make sure to uncheck Turn on Filter Keys under Make it easier to type.

Step 6: Click Apply followed by OK.
Step 7: Reboot your PC to save changes and see if you can Fix Wireless Mouse Not Working in Windows 10.
Method 4: Update Wireless Mouse Driver
Step 1: To launch Device Manager, press Windows Key + R, type “devmgmt.msc”, and press Enter.

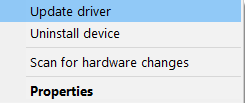
Step 2: Right-click your Wireless Mouse and select Update Driver after expanding Mouse and other pointing devices.
Step 3: Click “Browse my computer for driver software” on the next screen.
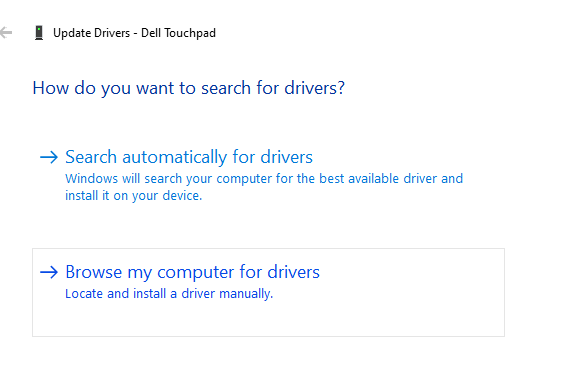
Step 4: Select “Let me choose from a list of device drivers on my computer” from the drop-down menu.
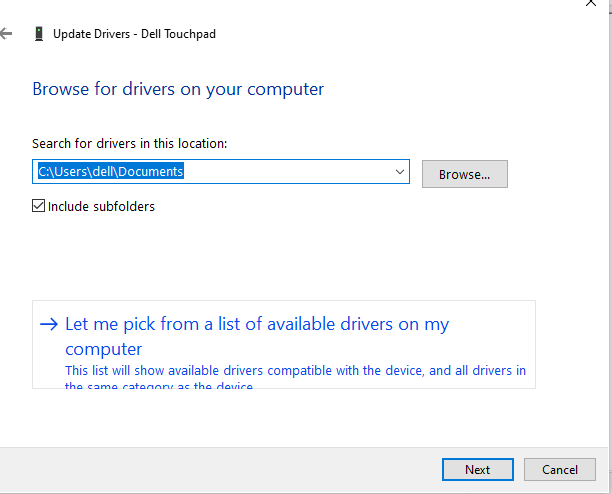
Step 5: Uncheck “Show suitable hardware” and pick one of the devices from the list.
Step 6: To continue, click next, and if prompted for confirmation, pick Yes.
Step 7: Reboot your computer to save your changes, then repeat steps 1-4.
Step 8: Click Next after checking “Show compatible hardware” and selecting the provided driver, preferably a PS/2 Compatible Mouse.
Step 9: Restart your computer to see if the Wireless Mouse Not Working in Windows 10 is resolved.
If the driver is not available, check and download from here.
Method 5: Reinstall Wireless Drivers
Step 1: Press the Windows Key + R keyboard shortcut, then type devmgmt.msc and press Enter.

Step 2: Right-click your wireless mouse and select Uninstall after expanding Mice and other pointing devices.
Step 3: Reboot your computer to save your changes, and Windows will automatically install the device’s default drivers.
If the driver is not available, check and download from here.
Method 6: Perform Clean Boot
Third-party software can sometimes clash with Mouse Drivers, preventing you from using the Wireless Mouse.
To resolve the issue with your wireless mouse not working, you must first conduct a clean boot on your computer and then assess the problem accordingly. To know in detail, visit Microsoft Support.
Method 7: Install IntelliPoint software
If you already have this software installed, double-check that your wireless device is operational.
Install the IntelliPoint application once more to use the Mousinfo diagnostic tool.
Conclusion
Hopefully, you’ve successfully resolved the Wireless Mouse Not Working in Windows 10 issue. If you have any further questions, please post them below. If you cannot fix using the above steps, you might try to Repair Windows 10 as a last resort.


Leave a Reply