Table of Contents
Introduction
In this article, we will learn to enable stereo mix on windows 10.
The stereo mix is a feature that allows users to record the sound coming out from the speakers of their Laptop/PC. The output streams such as radio broadcasting, speaker output, live streaming audios, etc.
Many a time, it happens when the user wants to record the output stream coming out from the device itself but is unable to do so. This is the main reason for using this advanced feature.
To enable the Stereo Mix on your computer, then proceed with the steps written below.
Steps to be followed to enable stereo mix on windows 10
Step:1 Open the Run window using the “Window key + R” shortcut.
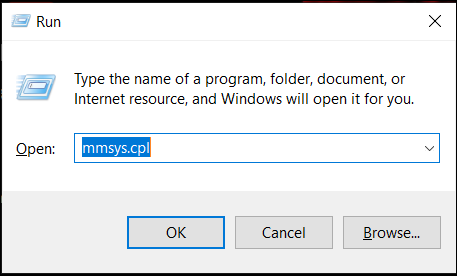
Step:2 Type “mmsys.cpl” to open the Sounds utility window.
Step:3 Click on the “Recording tab”.
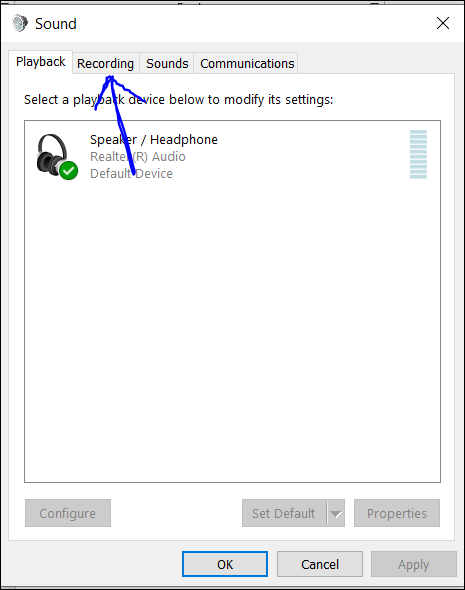
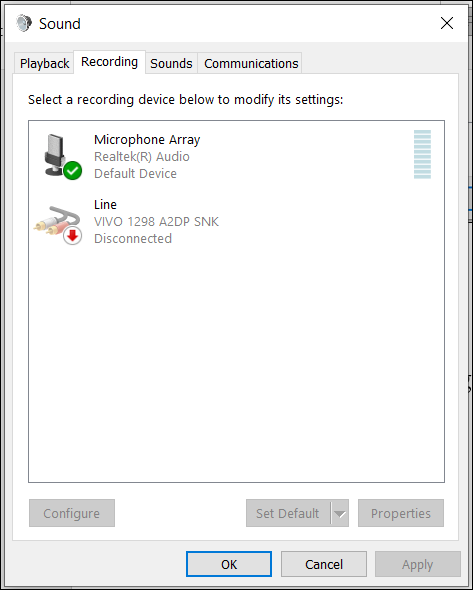
A new window will appear as shown below.
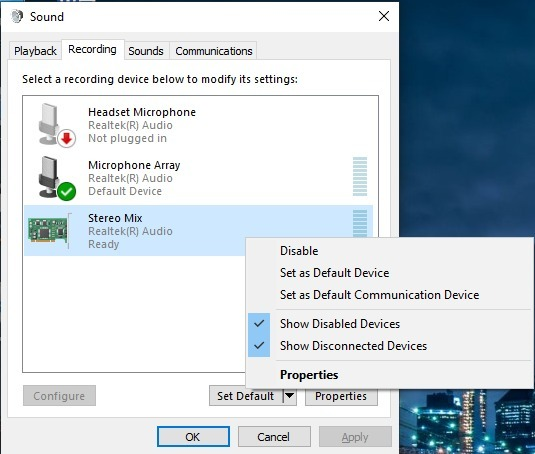
Step:4 After that just “right-click” on the space and click on the “Show disabled Devices” option.
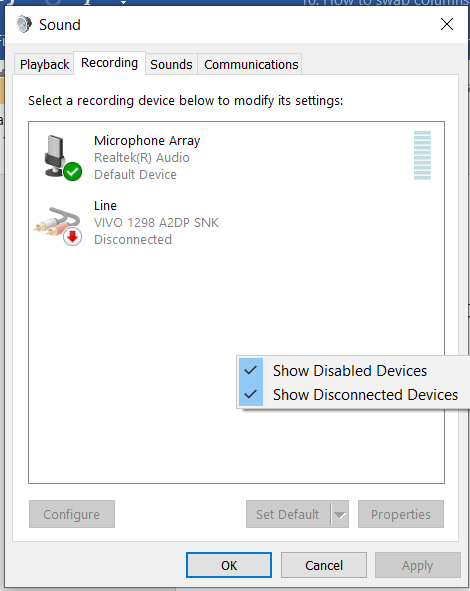
After enabling the “Show Disabled Devices” you will notice that “Stereo Mix” is now available in the list.
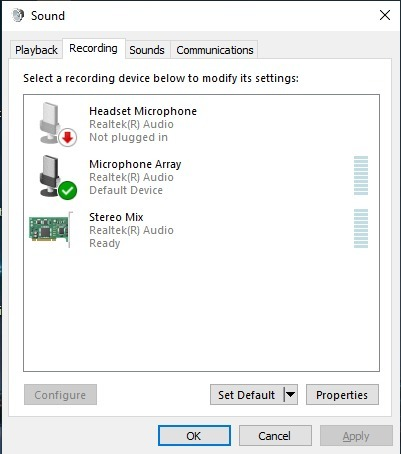
It means you have enabled the visibility of the “Stereo mix” which was disabled earlier.
Step:5 Right-click on the “Stereo Mix” option and click on “Set as Default Device”.
Step:6 After choosing the default option, “stereo mix” comes with a little green mark, confirming its enabling.
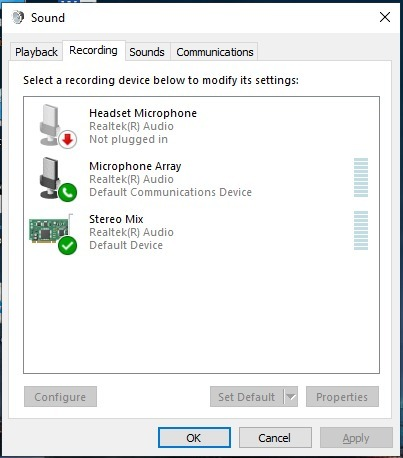
Step:7 Click on “Apply” and then click “ok” to save the change.
Conclusion
That’s the way to enable stereo mix on Windows 10. However, there is a possibility that on opening the “Sounds” stereo Mix is unavailable. To resolve this issue, try to update the system first. Also, you should try downloading and installing drivers from older windows versions for your audio chipset.
While performing any of the above solutions, make sure you have successfully created a backup of your system.


Leave a Reply