
Table of Contents
Introduction
Users are reporting a new issue in which Windows 10 boots to a blue screen that says, “Preparing Security Options,” and you can’t use your keyboard and are locked there.
This issue dates to Windows 7, but happily, there are several fixes that appear to resolve the issue.
In most cases, the Windows 10 Preparing Security Options error warning appears on the welcome screen or when you log off.
There is no specific source for this error message; some say it’s a virus problem, while others believe it’s a hardware problem. One thing is certain: Microsoft refuses to accept the problem because it’s their fault.
So, without spending any time, let’s see how to use the troubleshooting approach below to fix Windows 10 Stuck at Preparing Security Options and How to Fix the “Preparing Security Options” Error on Windows.

How to Fix the “Preparing Security Options” Error on Windows
Method 1: Run System Restore
Before you do anything, the easiest way to fix this error is to use Windows System Restore. Yes, you can go back to a time when your computer was running normally, and you weren’t experiencing the application error 0xc0000005.
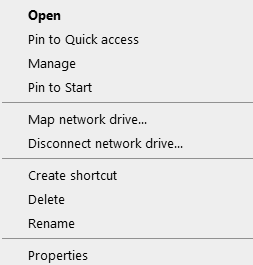
Step 1: Select Properties from the context menu of “This PC” or “My Computer.”
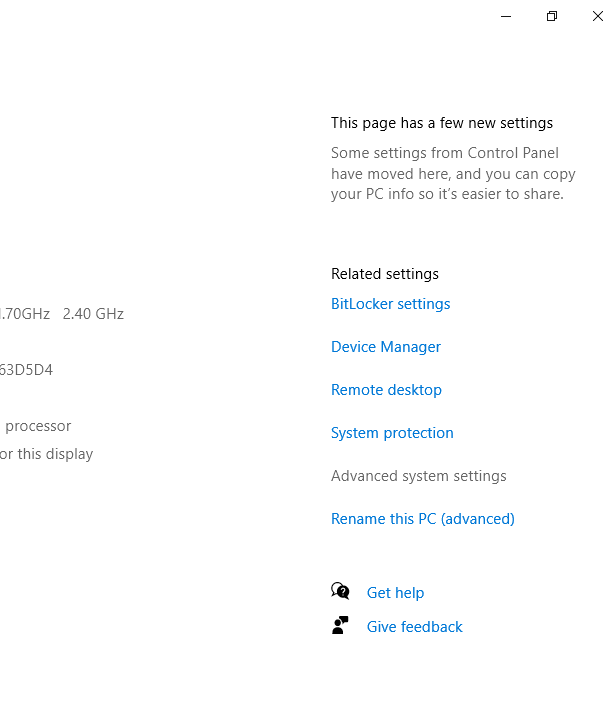
Step 2: Select “Advanced system settings” in the middle-right corner of the properties box.
Step 3: Select the tab “System Protection” in the advanced options window, then “System Restore.”
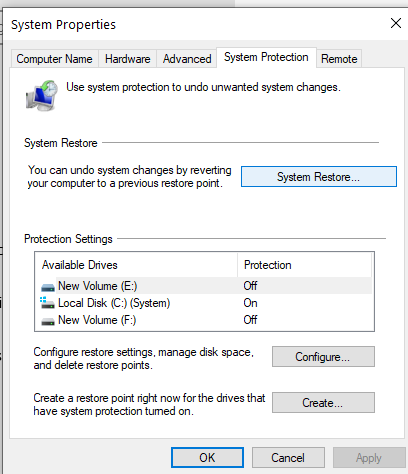
Step 4: Select Next and select “Show more restore points.”
Step 5:Choose one restoration point from there (probably select the restore point which is 20-30 days before the current date).
Step 6: A dialogue window will open asking for confirmation. Finally, press the Finish button.
Step 7: That’s it; it’ll take a while, but you’ll be back to where you were before.
Method 2: Run System File Checker (SFC) and Check Disk (CHKDSK)
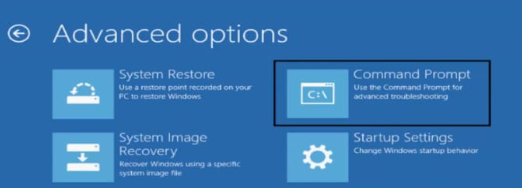
Step 1: Simply click on the command prompt in the Advanced options panel to return to the command prompt using the Windows media creation tool.
Step 2: In cmd, type the following commands, pressing enter after each one:
sfc /scannow /offbootdir=c:\ /offwindir=c:\windows
chkdsk C: /f /r /x
Note: Make sure that you use the drive letter where Windows is currently installed.
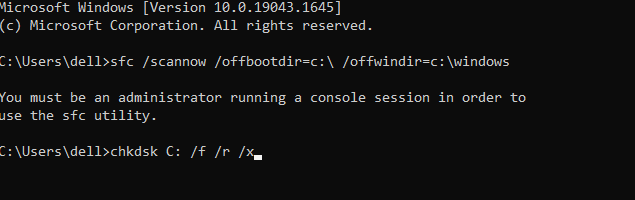
Note: In the above command, C: is the drive on which we want to run check disc, /f is a flag that tells chkdsk to rectify any faults on the drive, /r tells chkdsk to look for damaged sectors and perform recovery, and /x tells check disc to dismount the drive before starting the procedure.
Step 3: If you want to schedule the scan for the next system reboot, select Y and press Enter.
Step 4: Restart your computer after exiting the command prompt.
Method 3: Repair the Boot sector or Rebuild BCD
Step 1: Open a command prompt with the Windows installation disc using the technique described above.
Step 2: Now, one by one, input the following commands, pressing enter after each one:
a) bootrec.exe /FixMbr

b) bootrec.exe /FixBoot
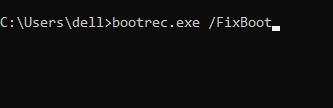
c) bootrec.exe /RebuildBcd

Step 3: If the above command does not work, use cmd to run the following commands:
bcdedit /export C:\BCD_Backup
c:
cd boot
attrib bcd -s -h -r
ren c:\boot\bcd bcd.old
bootrec /RebuildBcd
Step 4: Finally, close the cmd window and restart your computer.
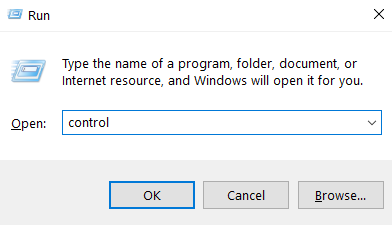
Method 4: Disable Fast startup
Step 1: To launch the Control Panel, use Windows Key + R, then type control and press Enter.
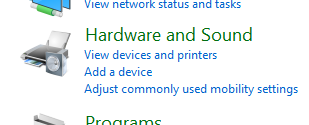
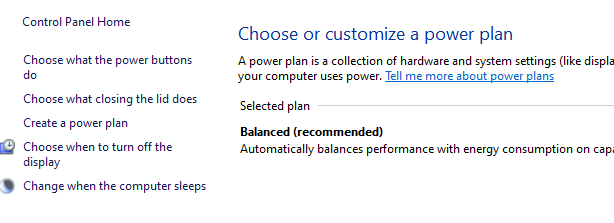
Step 2: Go to Hardware and Sound, and then to Power Options.
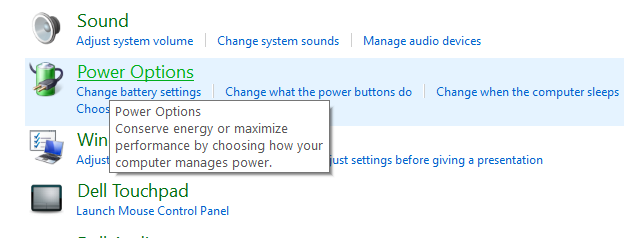
Step 3: Select “Choose what the power buttons do” from the left window pane.
Step 4: Now go to “Change settings that are presently unavailable” and select “Change settings that are currently unavailable.”
Step 5: Click on save changes after unticking “Turn on fast startup.”
Method 5: Run Automatic/Startup Repair
Step 1: Restart your computer after inserting the Windows 10 bootable installation DVD.
Step 2: When asked to boot from a CD or DVD, hit any key, then any key to continue.
Step 3: Click Next after selecting your language options. In the bottom-left corner, click Repair your computer.

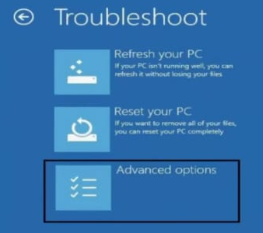
Step 4: Click Troubleshoot on the Choose an Option screen. Select the Advanced option on the Troubleshooting screen.
Step 5: Click Automatic Repair or Start-up Repair on the Advanced Settings screen. Await the completion of the Windows Automatic/Startup Repairs.
Step 6: Restart to see if the Logonui.exe system error has been resolved; if not, proceed.
Method 6: Manually uninstall recently installed updates
Step 1: To access Settings, press Windows Key + I, then select Update & Security.

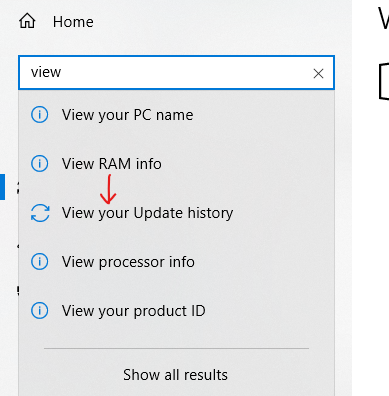
Step 2: Select Windows Update from the left-hand menu, then click “View installed update history.” Or, search it in a search bar.
Step 3: On the following screen, select Uninstall updates.

Step 4: Finally, double-click the most recent update in the list of recently installed updates to delete it.
Step 5: Restart your computer to save your modifications.
Method 7: Restart the Windows Update service
Step 1: Using any of the methods given, start your computer in Safe Mode.
Step 2: Press Windows Key + R, then type services.msc and press Enter.
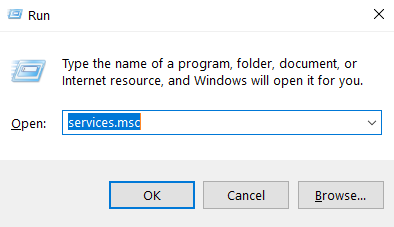
Step 3: Locate the services listed below:
Background Intelligent Transfer Service (BITS)
Cryptographic Service
Windows Update
MSI Installer
Step 4: Select Properties from the context menu by right-clicking on each of them. Ensure that their Startup type is Automatic.
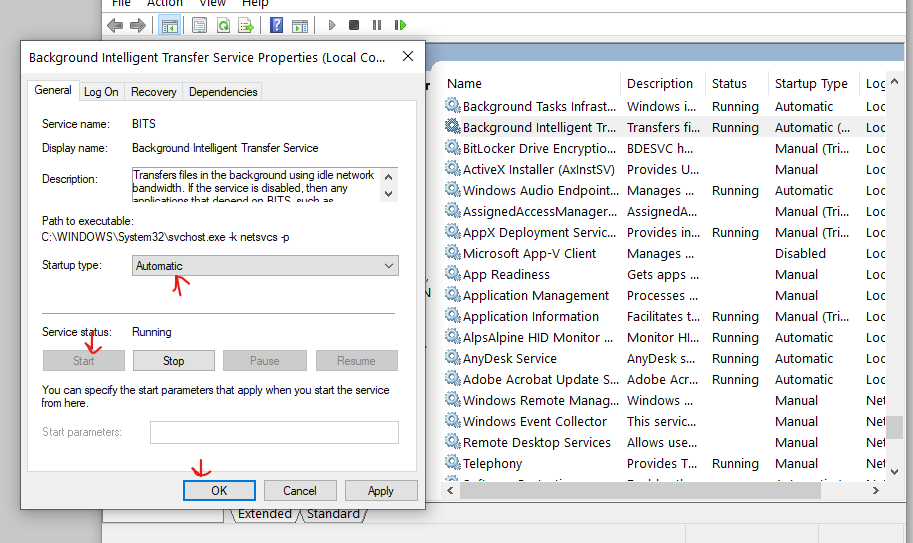
Step 5: If any of the above services have been disabled, be sure to select Start from the Service Status menu.
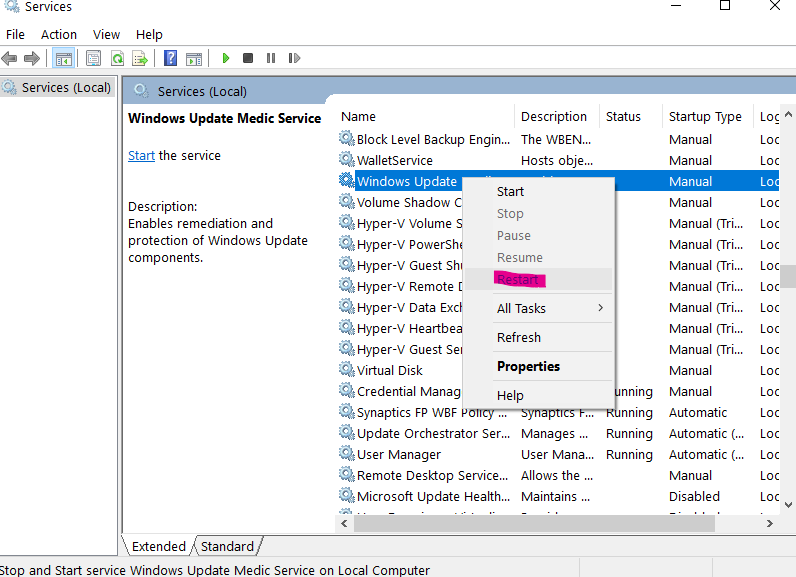
Step 6: Select Restart from the context menu of the Windows Update service.
Step 7: Click Apply, then OK, and then restart your computer to save your changes.
Method 8: Disable Credential Manager Service
Step 1: Using any of the methods given, start your computer in Safe Mode.
Step 2: Press Windows Key + R, then type services.msc and press Enter.

Step 3: Select Properties from the Credential Manager Service by right-clicking it.
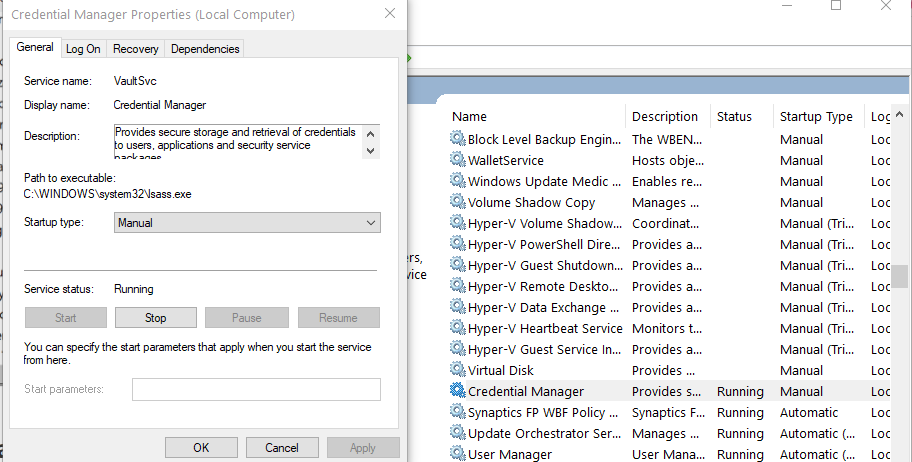
Step 4: Select Disabled from the Startup type drop-down.
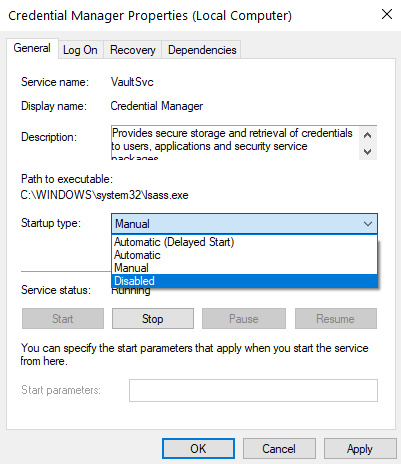
Step 5: Click Apply and then OK.
Step 6: Restart your computer to save your modifications.
Method 9: Perform Clean Boot
Third-party software can sometimes clash with Mouse Drivers, preventing you from using the Wireless Mouse.
To resolve the issue with your wireless mouse not working, you must first conduct a clean boot on your computer and then assess the problem accordingly. To know in detail visit Microsoft Support.
Conclusion
In this article, we have highlighted all the required details on how to fix the “Preparing Security Options” error on Windows. If you have any other problems related to this, then let us know in the comment area.

Leave a Reply