
Table of Contents
Introduction
If you’re using MS Word and want to customize the margins according to your preferences, for example, from the top or bottom or anywhere, you’d like to set a 1-inch margin but can’t. Then this is the article for you. We’ve outlined all of the steps in this article to set up 1-inch margins in Microsoft Word.
Methods To Set Up 1 Inch Margins In Microsoft Word
Step 1: Press the windows keys. Or, click on the windows icon. Search for MS Word. Here we are showing the images of MS Office Word 2007. The steps remains the same for all the newer versions including Office365.

Step 2: Click on the page layout.

Step 3: Click on margins. As you can see, in the normal option, you already have a 1-inch margin from everywhere. So, you can either select normal or click on custom margins.
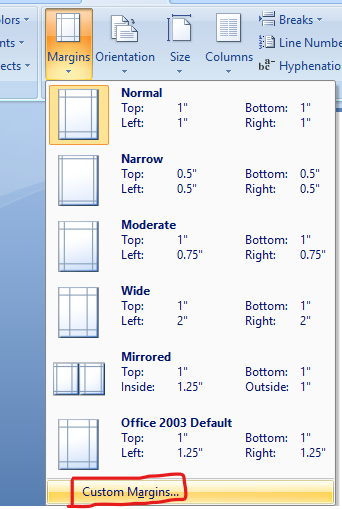
Step 4: After clicking on custom margins, in the column where you wish to set up to 1 inch, enter 1 inch. Now, your margin from the top or bottom or anywhere will be 1 inch.

Conclusion
In the above post, we have given all the required steps to set up 1-inch margins in Microsoft Word.
Read all Microsoft Word-related Fixes and How-To here.

Leave a Reply