Table of Contents
Introduction
You’ve probably noticed that the top row of your keyboard has labels ranging from F1 to F12.
These keys can be found on every keyboard, whether for Macs or PCs.
These keys may perform different functions, such as the Fn lock key, which serves a separate function while held down, allowing you to employ the secondary action of the Fn keys, which are placed above the number keys at the top of your keyboard.
These Fn keys can also regulate the brightness, volume, and music playing, among other things. You may also lock the Fn key, which works similarly to a caps lock in that it allows you to write in capital letters when turned on and lowercase letters when turned off.
When the Fn key is locked, you can still use the Fn keys to conduct particular activities without holding the Fn lock key.
In this article, we have outlined all the methods in order to help you use the Fn lock in Windows 10.
Method 1: Use the Keyboard Shortcut
Firstly, locate the Fn lock key. You’ll locate it above the number keys on the top row. The Fn lock key has a lock icon on it. The lock key icon is usually found on the Esc key, but if it isn’t, it can be found on any of the keys from F1 to F12. However, there’s a good chance your laptop doesn’t have this Fn lock key because some laptops don’t come with it. To enable or disable the conventional F1, F2, F12 keys, locate the Fn key next to the Windows key on the keyboard and click the Fn key + Fn lock key.
Method 2: Access the BIOS or UEFI Settings
You will notice a brief screen with a logo flash up at the start if you restart Windows or hit the Power button to start the laptop. This is the screen that gives you access to the BIOS or UEFI settings.
You must now hunt for a shortcut by pressing the F1 or F10 keys to enter BIOS. These shortcuts, however, will alter depending on the laptop brand. You must press the shortcut key specified by your laptop maker; you can find this information on your laptop’s start screen. F1, F2, F9, F12, or Del are the most common shortcuts.
You must discover the function keys option in the system setup or go to the advanced settings once you have booted into BIOS or UEFI settings.
Finally, toggle the function keys option on or off.
How To Access BIOS or UEFI from Windows Settings
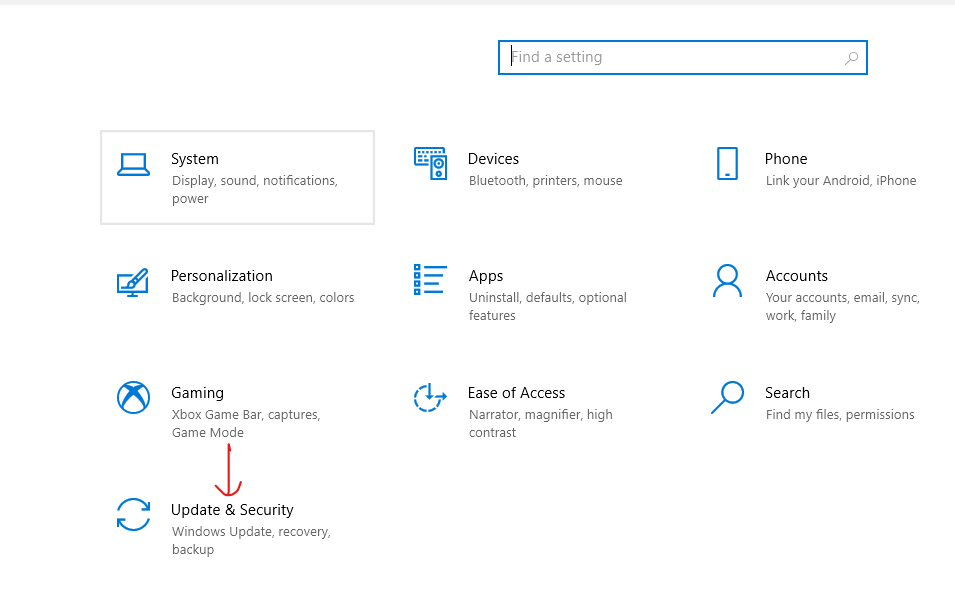
Step 1: To launch Windows Settings, press Windows key + I. Locate and select ‘Update and Security’ from the drop-down menu.

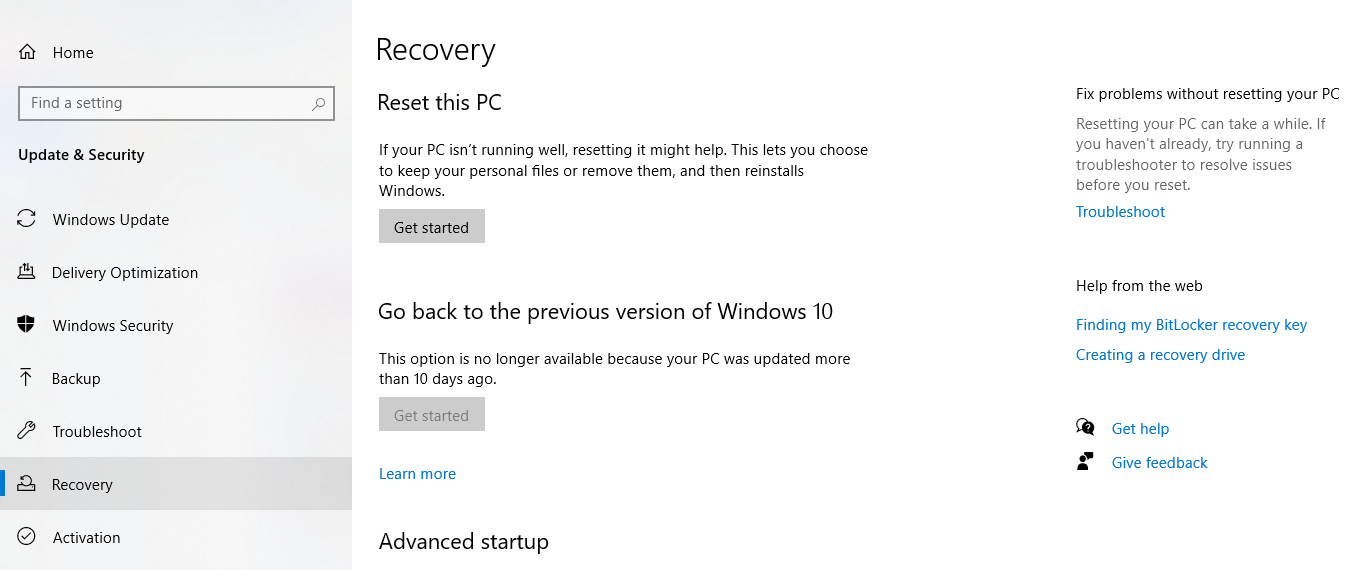
Step 2: Select the Recovery tab from the list on the left of the screen in the update and security box. Click Restart now in the Advanced Startup section. This will restart your computer and send you to the UEFI menu.

Step 3: You must now pick the Troubleshoot option when Windows boots into Recovery mode.
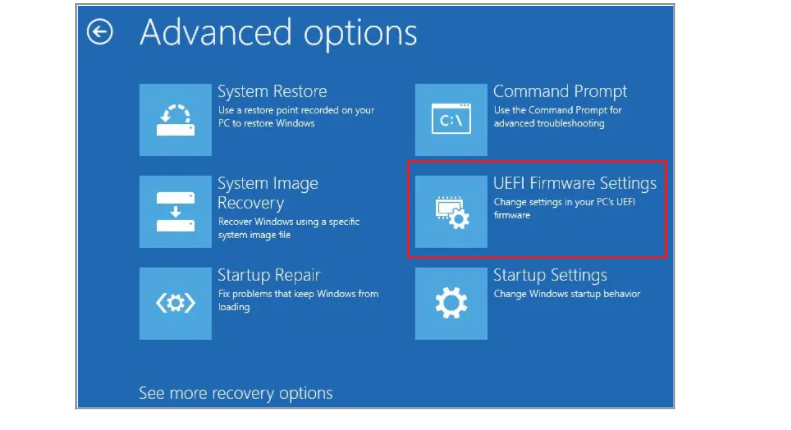
You must choose Advanced Options under Troubleshoot.
Step 4: Select UEFI Firmware Settings from Advanced Options and restart. Finally, after your laptop has restarted, go into the UEFI and look for the function key option. You can quickly enable or disable the Fn key, as well as use the function keys without having to hold down the Fn key.

Conclusion
In this article, we have outlined all the methods in order to use the Fn key lock in Windows 10. If you have any other queries or suggestions let us know in the comment area.


Leave a Reply