Table of Contents
Introduction
Are you having trouble with your PC, particularly performance issues and blue screens? Your computer’s RAM may be producing cases. When RAM causes a problem, you should investigate it even if it is uncommon. Because Random Access Memory (RAM) is one of the essential components of your computer, you should check your computer’s RAM for defective memory anytime you have a problem. It would be tough for a non-technical person to diagnose the RAM problem. As a result, we should begin by identifying the signs of RAM problems before moving on to RAM testing. This article will try to test your Computer’s RAM for Bad Memory.

Symptoms of RAM Errors
1. Your system freezes for some time, making it difficult to open special programs. It can sometimes prevent software from starting, causing your system to hang. Conclusively, we can say that the system’s performance concerns are the initial determinants of RAM failures. It’s possible that these problems are caused by a virus or malware.
2: Who can forget Windows’ famed blue screen of death? If you haven’t installed any new application or hardware and are still receiving a blue screen, there’s a good possibility you’re experiencing a RAM issue.
3: If your computer restarts at random, it indicates RAM issues. There could be various additional causes for this issue, but one of the options for resolving the random restart issue is to check your RAM.
4: You notice that some of your system files are corrupted. If you’re not adequately saving all those files, you should run a hard disk diagnostic application. If everything seems to be in place, you should investigate RAM problems because they can corrupt those files.
Diagnose the RAM Problems
There are two ways to begin troubleshooting a RAM error: first, manually open the computer and remove the RAM, then replace it with new RAM to see if the problem is still present or gone. Make sure your new RAM is compatible with your computer. Another approach is to use a Windows Memory Diagnostic tool, such as MemTest86, to troubleshoot the RAM issue.
How to test your Computer’s RAM for Bad Memory
Make sure to Create a Restore Point before moving ahead.
Method 1: Windows Memory Diagnostic Tool
1. Open the Memory Diagnostic Tool in Windows. To get started, go to the Windows search box and type “Windows Memory Diagnostic.”

Note: You can also execute this tool by hitting “Windows Key + R” and typing “mdsched.exe” into the Run dialogue box.

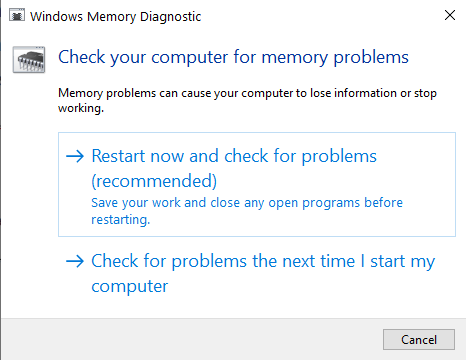
2. A pop-up box will be seen on your screen, requesting that you restart your computer to begin the application. You must restart your computer to use the diagnostic tool. You will be unable to operate your computer while the application is running.

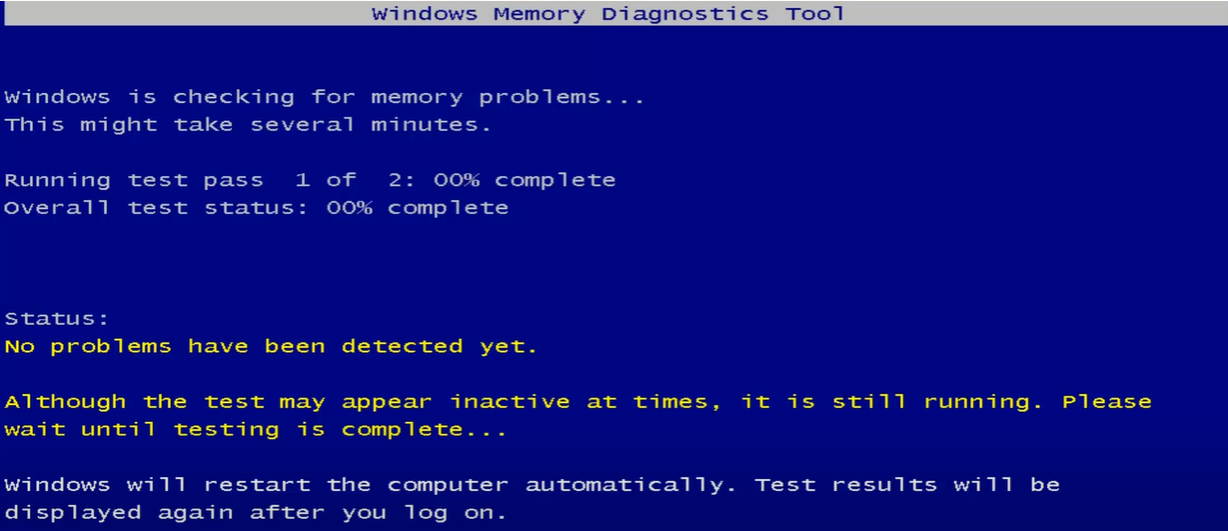
Your system will now restart, and the Windows Memory Diagnostic tool screen will display on your screen, along with a progress bar. Furthermore, the test will display a notification if it identifies any irregularities or problems with the RAM. This test and its results will take several minutes to complete.
Rather than waiting for the result, you can leave your computer and return later to check it. While Windows is evaluating RAM, you can do something else with your time. Your system will be automatically restarted after the operation is completed. You will be able to see the results once you log in to your computer.
Hopefully, you will be able to test your computer’s RAM for bad memory using the Windows Memory Diagnostic tool, but if you are unable to see the Memory Diagnostic test results, don’t panic. Simply follow the instructions mentioned below, and you will be able to see the test results.
What if you do not find the results?
Try the procedure described below to see the Windows Diagnostic Tool results if you don’t get the results after logging back in.
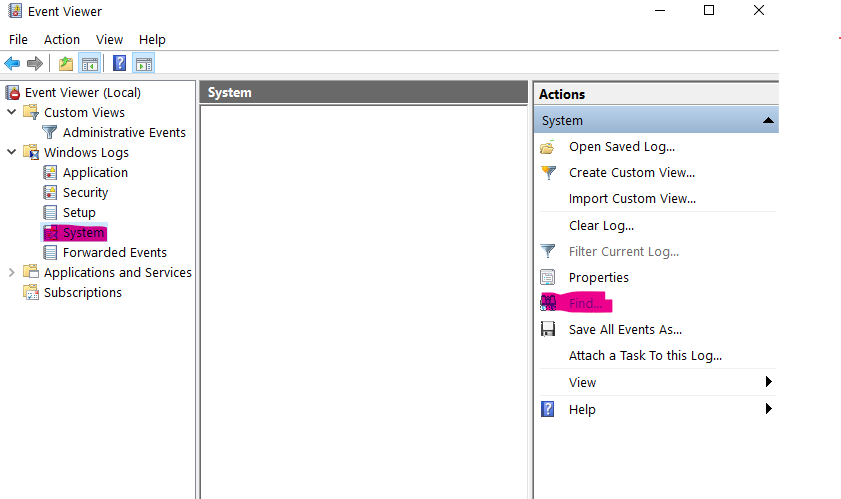
Step 1: Launch Event Viewer—To start the Event Viewer, right-click on the Start menu and select Event Viewer.

Step 2: Select “Windows Logs” and then “System” to view a list of occurrences. Simply select the Find option to locate the specific one.

Step 3: Type “Memory Diagnostic Tool” into the search box and hit the “Find Next” button to see the results.
Method 2: Run MemTest86
With the most powerful testing tool available, you can use MemTest86 to test your computer’s RAM for problematic memory problems. This diagnostic tool provides you with more options and capabilities to diagnose errors that Windows tests typically overlook.
It is available in two versions: free and paid versions. You can upgrade to the premium version for extra features.
You might not get the right report for your diagnostic task if you use the free version. The free version of MemTest86 has been reported as not working properly. Both versions are bootable, and you can use the ISO image file to make a bootable USB or CD and begin testing your system.
Depending on where you installed the bootable files, you must restart your system after creating the bootable file and boot it from either a USB drive or a CD drive.
Follow the instructions below to test your computer’s RAM for bad memory with MemTest86:
Step 1: Connect your computer to a USB flash drive.
Step 2: Get the Windows Memtest86 Auto-installer for USB Key and install it.

Step 3: Right-click the image file you just downloaded and now choose “Extract here” from the context menu.
Step 4: Once extracted, enter the folder, and run the Memtest86+ USB Installer.
Step 5: To burn the MemTest86 software, select your plugged-in USB device (this will format your USB drive).
Step 6: After the previous steps have been completed, connect the USB to the PC that is experiencing the RAM Bad Memory issue.
Step 7: Restart your computer and choose to boot from the USB flash device.
Step 8: Memtest86 will start checking your system for memory corruption.
Step 9: If you passed all the tests, you can be confident that your memory is in good working order.
Step 10: If some of the stages fail, Memtest86 will detect memory corruption, indicating that the RAM contains some faulty sectors.
Step 11: If bad memory sectors are discovered, you will need to replace your RAM to fix the problem with your machine.
Conclusion
Hopefully, the preceding procedures were useful, and you can now simply test your computer’s RAM for bad memory, but if you have any more questions, please leave them in the comments area.


Leave a Reply