Table of Contents
Introduction
It’s never easy to work with electrical devices and equipment. On your device, difficulties will appear every now and then. Whether it’s a mobile phone or a computer, you’ll have to deal with a variety of problems. Today, we’ll talk about a common problem that many encounters when using windows. The problem is the data file doesn’t contain valid information for the operating system’s notification that appears on your screen after your computer is on. It isn’t just a bug. This message appears on your device as a result of a corrupt BCD file. BCD (Boot Configuration Data) is an acronym for Boot Configuration Data.
This article will guide you through the procedure of How to Fix The Boot Configuration Data File Doesn’t Contain Valid Information.
Steps To Fix The Boot Configuration Data File Doesn’t Contain Valid Information
Method 1: Manually Rebuild the BCD file
Step 1: Firstly, you will need to access the recovery tool, for which you’ll have to get a CD or pen drive. Then search the Windows 10 media creation tool. Click on download windows 10.

Click on download too now.

Step 2: Now, insert the CD or USB pen drive on your computer. Let it on. Then, press the F12 key on your keyboard. You will get the boot menu. Click on removable devices. Click on the Next button.
Step 3: Then, click on repair your computer. Click on troubleshoot.
Step 4: Click on the command prompt.

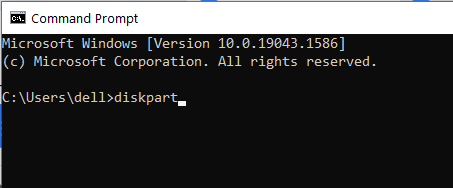
Step 5: Type diskpart, then press enter.

Step 6: Follow the following sets of commands on your command prompt. Then type EXIT.
Now turn off your computer and turn it on again. See if the issue is gone but if the issue continues. Again open the command prompt. And run the following set of commands. Type ‘Y’ and press enter. Now type EXIT. And, turn on your computer again.
Method 2: Perform a Startup Repair
Step 1: Prepare a bootable USB drive by following the instructions in How to Create a Windows 10 Bootable USB Flash Drive. Now connect it to your computer and press the Power button. You will be required to press a certain key to boot from the attached USB device on the boot screen; follow the instructions. (Alternatively, you can boot from the USB disc after entering the BIOS menu.) Select your language and keyboard in the Windows Setup window, then click the Repair your machine option in the bottom-left corner.
Step 2: On the ‘Choose an option’ screen, select Troubleshoot.

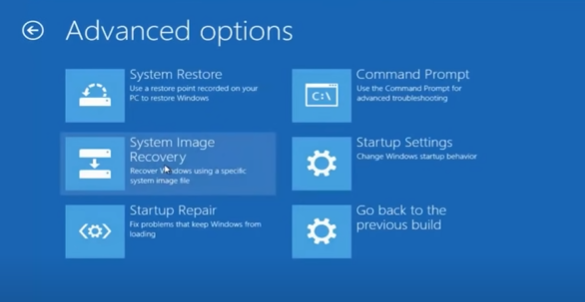
Step 3: Go to the Advanced Options tab.

Step 4: Finally, select the Startup Repair option to begin a scan.

Conclusion
Follow all the steps above carefully. Don’t miss out on any actions. These are all the required steps to fix the boot configuration data file containing valid information. Read more Windows Fixes here.


Leave a Reply