Table of Contents
Introduction
DNS (Domain Name System) is your best buddy when you’re online. It translates the domain name of the website you visited into IP addresses so the computer can understand it. Let’s pretend you went to a website and typed in its domain name.
The browser will route you to a DNS server, where the IP address of the website you’re browsing will be stored. A log of all the IP addresses, i.e., the websites you’ve visited, is kept locally on your device.
It will assist you in gathering all of the information faster than before whenever you try to re-access the website. DNS Resolver Cache contains all of the IP addresses in the form of a cache.
When you try to access the site, you may get no results instead of faster results. As a result, you’ll need to clear the reset DNS resolver cache to receive a favorable outcome.
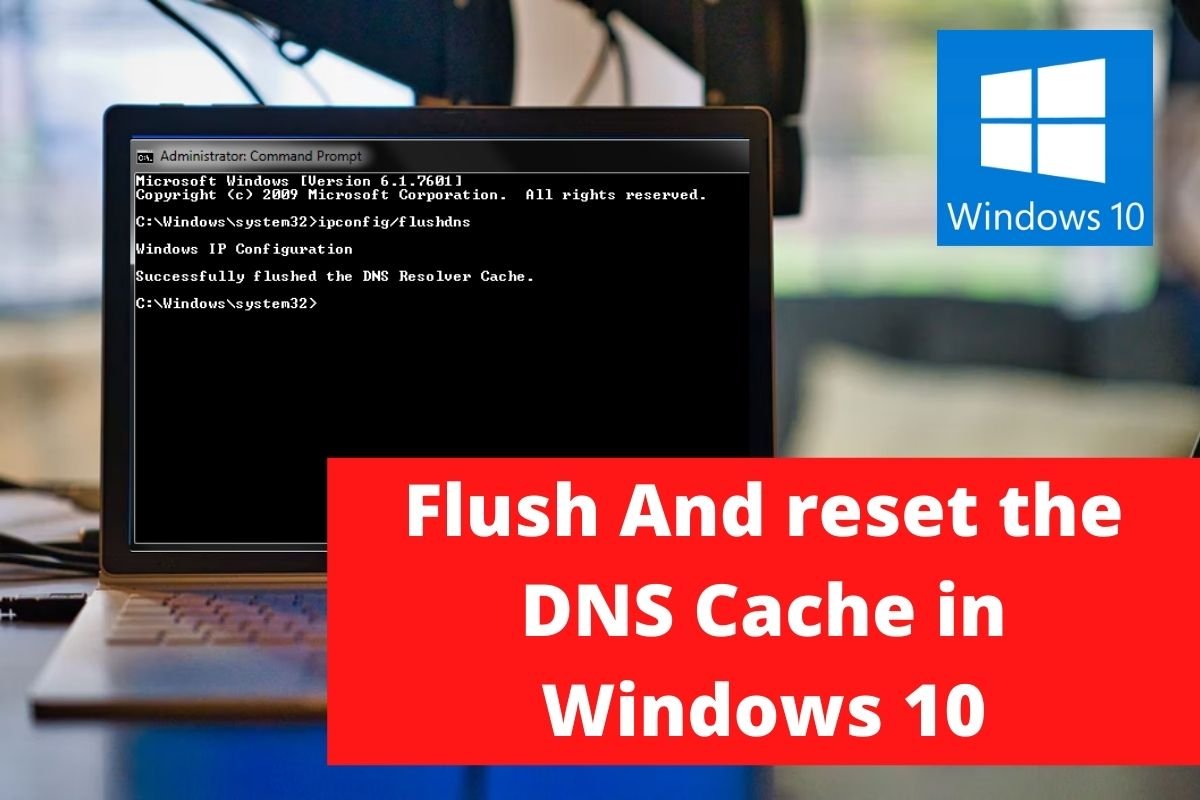
There are several common causes of DNS cache failure over time. The website’s IP address may have changed, but your records include the previous information. As a result, you may have the old IP address, which can cause issues when trying to connect. This article will help you to fix the issue related to flush and reset the DNS cache in Windows 10.
Steps To Flush and Reset the DNS Cache in Windows 10
Following are the methods to flush and reset the DNS cache in Windows 10:
Method 1: Use the Run Dialog Box
Step 1: Open the Run dialogue box using the shortcut key Windows Key + x. In the box, type ipconfig /flushdns and press the OK or Enter key.
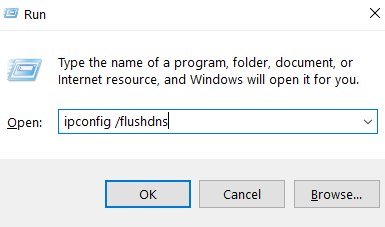
Step 2: A “cmd” box will appear on the screen, confirming that the DNS cache has been cleared successfully.
Method 2: Using Command Prompt
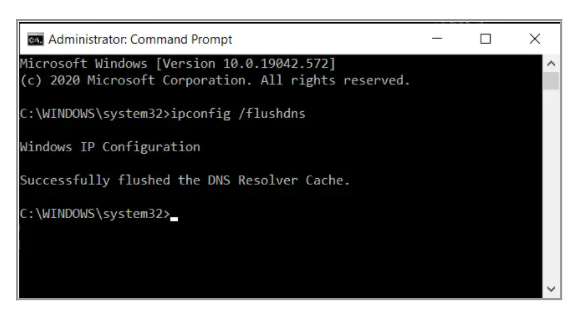
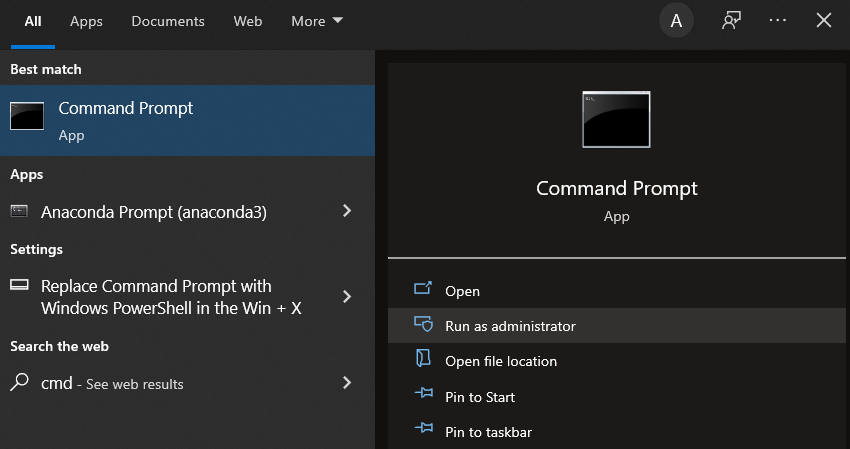
Step 1: Press the Windows key and search for cmd to access the command prompt. Click on the command prompt and click on the run as administrator.
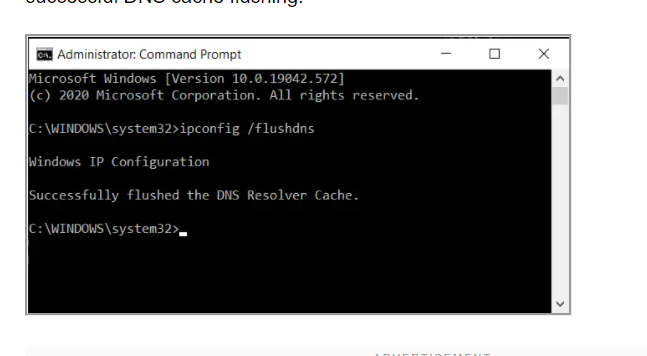
Step 2: Type “ipconfig /flushdns” and press the Enter key when the command prompt displays. When you press Enter, a confirmation box confirms that the DNS cache cleaning was successful.
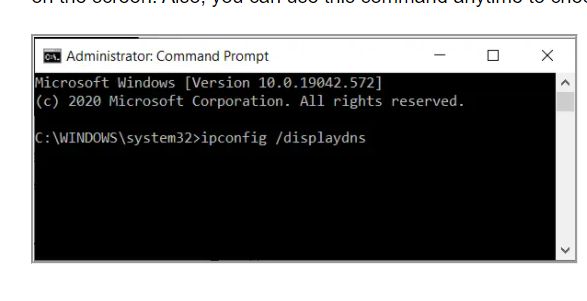
Step 3: To see if the DNS cache has been purged. Hit the Enter key after entering the command “ipconfig /displaydns.” If any DNS records are still present, they will be displayed on the screen. You can also use this command to check the DNS entries at any time.
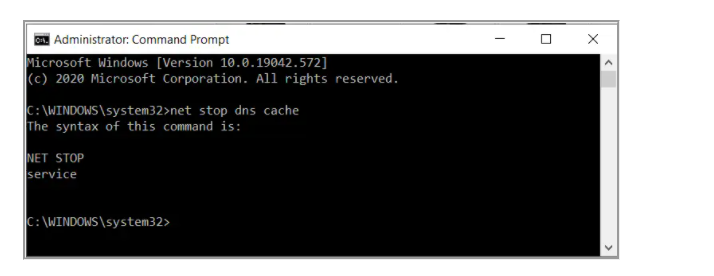
Step 4: To disable the DNS cache, run net stop DNS cache in the command line and press Enter.
Step 5: To enable the DNS cache, open the Command Prompt and type net start dnscache followed by the Enter key.

Method 3: Using Windows PowerShell
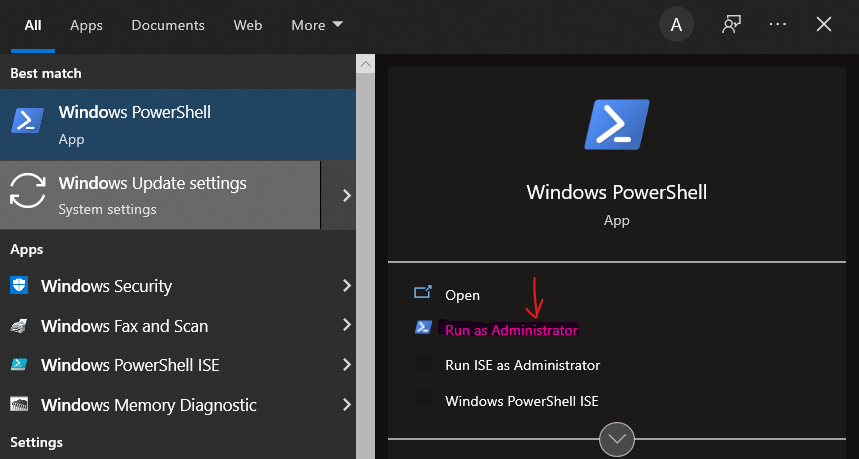
Step 1: Open Windows PowerShell using the run dialog box or the search bar.
Step 2: Enter the command Clear-DnsClientCache in Powershell and hit the Enter button to clear the client-side cache.

Step 3: Enter Clear-DnsServerCache and hit the Enter key if you only want to clear the DNS cache on your desktop.

Conclusion
This article outlines all the methods to help you flush and reset the DNS cache in Windows 10. If you have any other queries or suggestions, let us know in the comment area
Read All Windows 10 Related How-To & Fixes here.

Leave a Reply