Table of Contents
Introduction
Let’s have a look at what a system restore point is and how to create one. System Restore Point lets you restore your computer’s state (including system files, installed apps, Windows registry, and settings) to a previous time when it was working properly, allowing you to recover from malfunctions or other issues.
Occasionally, an installed application or driver causes an unexpected error or causes Windows to act in an unpredictable manner. Uninstalling the application or driver usually solves the problem, but if it doesn’t work, you might try restoring your system to a time when it was working fine.
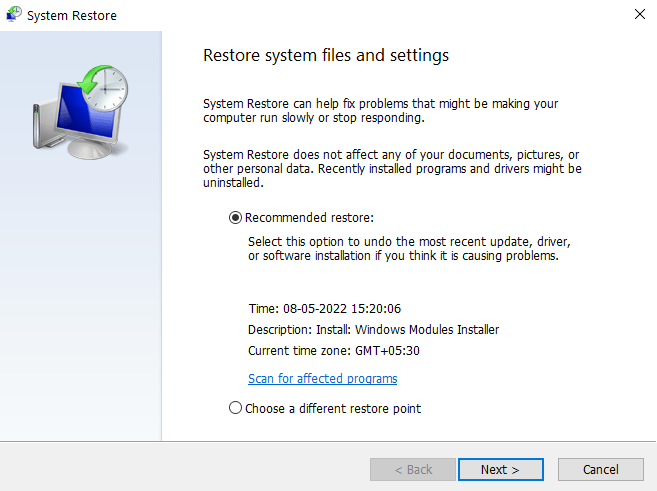
Before creating System Restore Point, make sure that you have enabled the system to restore as it is not enabled by default.
Enable System Restore in Windows 10
Step 1: Search for “create a restore point” in the Windows search box, then click the first result to open the System Properties window.
c 
Step 2: Select the C: drive (where Windows is installed by default) under the System Protection tab and click the Configure button.

Step 3: Put a checkmark next to it. Under restoration settings, enable system protection and select Max utilisation under disc consumption, then click OK.
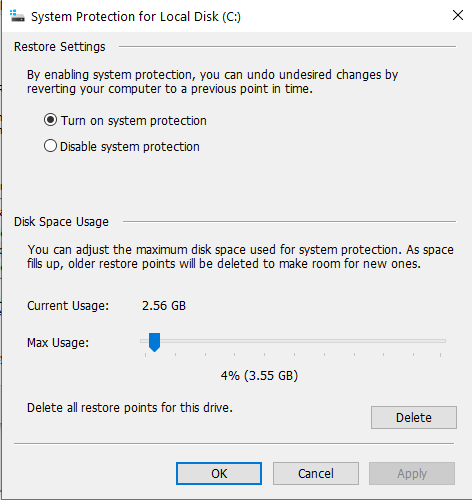
Step 4: To save the changes that you made, click Apply, then OK.
Method to Create a System Restore Point
Step 1: In Windows Search, type “restore point” and then click “Create a restore point” from the search results.
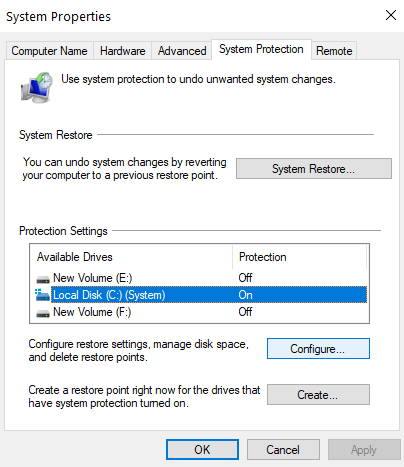
Step 2: Select the “Create” button from the System Protection tab.
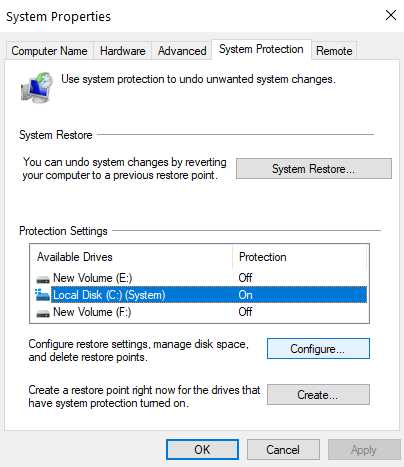
Step 3: Click “Create” after giving the restore point a name.
Note: Use a descriptive name because having too many restore points would make it difficult to remember which one was established for what purpose.

Step 4: A restore point will be created in a few moments.
Step 5: When you’re finished, click the “Close” button.
If your system encounters a problem or error that you are unable to resolve in the future, you can restore your system to this restore point, and all changes will be undone.
How to Perform System Restore
Once you’ve generated a system restore point, or if one already exists in your system, you can easily return your PC to its previous state by using restore points.
Follow the instructions below to utilize System Restore on Windows 10:
Step 1: Search for “Control Panel” in the Start Menu search box and open it.

Step 2: Select System and Security from the Control Panel.

Step 3: Select “System” from the drop-down menu.
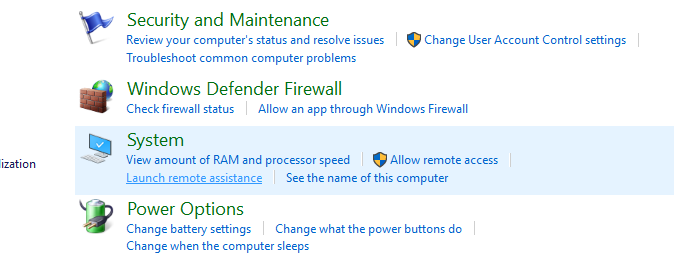
Step 4: Select System Protection from the System window’s top left-hand menu.
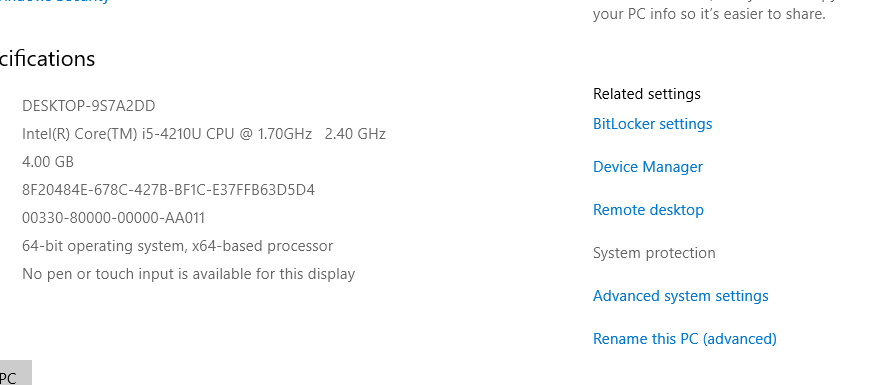
Step 5: A window with system properties will appear.
Click the System Restore button under the Protection Settings tab.

Step 6: When the System Restore box appears, click Next.
Step 7: You’ll see a list of system restore points.
Select the System Restore point for your computer and then click Next.
Step 8: You’ll see a confirmation dialogue box.
Finally, press the Finish button. When a notification appears that says—Once started, System Restore cannot be halted, click Yes.
Note: The procedure will be completed when some time has passed.
Don’t panic or try to force the system restore process to stop once it has started. It will take some time to finish, so don’t panic or try to force the process to stop.
System Restore will restore your computer to a previous state where everything was working properly when the restoration is finished.
Conclusion
Hopefully, one of the ways, as mentioned earlier, will allow you to create a system restore on Windows. However, if you still have any issues with this essay, please leave them in the comments area. If you cannot use the Windows System Restore tool, you can download another tool from here


Leave a Reply